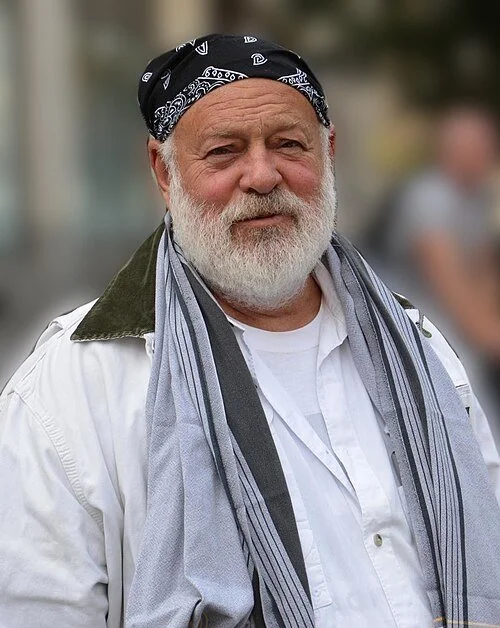
Bruce Weber
The Definitive Resource: The Cinematic Frame of Bruce Weber
Bruce Weber - Wikimedia Commons
Few visual artists have shaped the landscape of contemporary imagery as profoundly as American fashion photographer and filmmaker Bruce Weber. Born in Pennsylvania on March 29, 1946, Weber did not merely capture fashion; he engineered a distinct, hyper-stylized vision of Americana that bridged the gap between classic editorial portraiture and provocative cultural commentary. Best known for his evocative, large-scale monochrome aesthetics, Weber turned commercial photography into a fine art form that remains foundational to modern visual media.
The Commercial Avant-Garde: Redefining Branding
Weber’s ascent began in the late 1970s, making a striking editorial debut within the pages of GQ. His career trajectory shifted dramatically in 1978 when his longtime agent and closest collaborator, Nan Bush, negotiated a pivotal contract with Federal Department Stores to shoot the Bloomingdale’s mail catalog. This campaign dismantled traditional commercial layouts, introducing a raw, narrative-driven realism to retail advertising.
By the 1980s and 1990s, Weber had transitioned from an industry insider to a global cultural force. This era was defined by his historic partnership with Calvin Klein. Weber’s imagery—most notably his legendary, monumental portrait of Olympic athlete Tom Hintaus—fundamentally altered how the human form was utilized in mainstream marketing. He paired this subversive sensuality with a mastery of traditionalism, simultaneously developing the enduring, rugged winter aesthetic for Ralph Lauren’s landmark campaigns, including the celebrated 2006 winter collection.
Challenging the Frame: Controversy and Artistic Rebellion
Weber’s willingness to push societal and media boundaries frequently placed his work at the center of intense national dialogue. His early, boundary-pushing portfolios for the SoHo Weekly, which featured highly stylized imagery of men in minimalist underwear, challenged the rigid conservative standards of contemporary publishing. At a time when mainstream magazines viewed these artistic expressions as a professional liability, Weber chose to prioritize creative autonomy over commercial safety.
This unflinching approach to the human form frequently manifested in his editorial compositions—such as his celebrated, avant-garde framing of nudes on a swing, and his defining portraits of model Marcus Schenkenberg.
A Cinematic Evolution: Music Videos and Documentary Film
As a director, Weber translated his high-contrast, black-and-white photographic language seamlessly into moving images. His music video direction represents a masterclass in independent filmmaking, often sparking the same creative friction as his print work.
The Pet Shop Boys Collaborations: In 1990, Weber directed the iconic music video for "Being Boring." The video’s elegant, artistic use of nudity led to it being famously banned from rotation on MTV. Undeterred, Weber maintained a rich creative partnership with the group, later directing "Se a vida é" on location at a Florida water park in 1996, and "I Get Along" in 2002.
Chris Isaak & Narrative Portraiture: In 1988, Weber shot a definitive, intimate portrait of musician Chris Isaak for Rolling Stone. This collaboration evolved into the cinematic realm when Weber directed the moody, atmospheric music video for Isaak’s "Blue Spanish Sky."
Iconic Album Art: Weber’s lens captured the definitive visual identities for major musical releases, including Harry Connick Jr.’s Blue Light, Red Light (1991) and Jackson Browne’s I’m Alive (1993).
Beyond short-form music visuals, Weber established himself as an elite documentarian. His 1987 film Broken Noses, an intimate study of youth boxing, laid the groundwork for his magnum opus: the 1988 jazz documentary Let’s Get Lost. The film, which chronicled the tragic brilliance of trumpeter Chet Baker, earned an Academy Award nomination and is widely regarded as a masterpiece of non-fiction cinema. His expansive filmography includes deeply personal essays and long-form projects such as Backyard Movie (1991), Gentle Giants (1994), The Teddy Boys of the Edwardian Drape Society(1996), Chop Suey (2000), A Letter to True (2004), and Wine and Cupcakes (2007).
Institutional Legacy and Monographs
Weber’s prolific output has been preserved in a series of highly sought-after fine art monographs. His published bibliography spans decades of visual culture, featuring landmark titles such as:
Looking Good: A Guide For Men (1977)
O Rio de Janeiro (1986)
Bear Pond (1990)
Blood, Sweat and Tears: Or How I Stopped Worrying and Learned to Love Fashion (1999)
All-American XII (2012)
Today, Bruce Weber’s contributions to the visual arts are preserved in the permanent archives of premier international institutions, including London’s Victoria and Albert Museum and Paris’s Musée d'Art Moderne. His retrospectives and fine art collections continue to be exhibited globally, with featured showcases at the Whitney Biennial, Venice’s Palazzo Fortuny, the Switzerland Musée l’Elysée, the Florence Biennale, London’s National Portrait Gallery, and Milan’s Galleria Carla Sozzani (10 Corso Como).
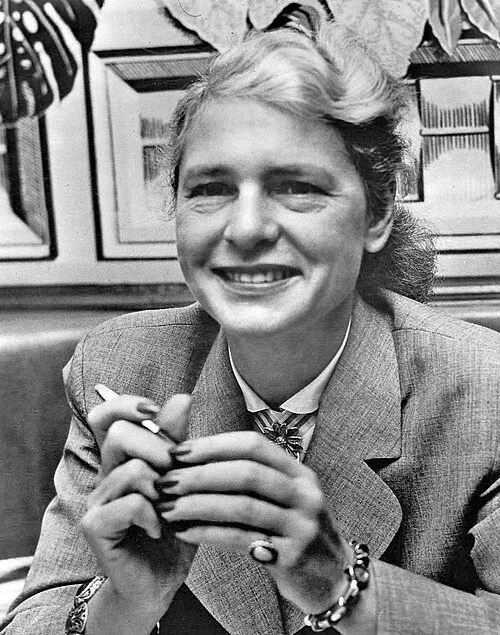
Margaret Bourke White
Margaret Bourke-White - Wikimedia Commons
Margaret Bourke-White: The Industrial Pioneer of the Human Condition
Before the era of instant communication, Margaret Bourke-White (1904–1971) was the eyes of the American public. From the wreckage of the Great Depression to the liberation of Nazi concentration camps and the birth of nations, her work represents the Gold Standard of photojournalism—documenting the world’s most visceral malfunctions with clinical precision.
The Institutional Firsts
A graduate of Cornell (1927), Bourke-White didn’t wait for permission; she engineered her own access. She established herself as a freelance industrial specialist before becoming the "First" in nearly every high-stakes category:
The Global Access: The first foreign photographer allowed into the Soviet Union (1930).
The Life Era: The first female photojournalist for Life Magazine, with her shot of the Fort Peck Dam gracing its inaugural 1936 cover.
The War Correspondent: The first woman accredited as a war correspondent, surviving torpedo attacks and documenting the Air Force in combat.
Documenting the "Wholesale Slaughter"
Bourke-White’s lens was a tool for social extraction. In the mid-1930s, she captured the victims of the Dust Bowl. In 1937, she collaborated with Erskine Caldwell on You Have Seen Their Faces, a graphic portrayal of the rural under-class. Her work didn't just "show" poverty; it screamed it.
During the partition of India and Pakistan, she captured the definitive "DNA" of history: Gandhi at his spinning wheel and the "vacant eyes" of refugees amidst mass migration. Her shots of corpses and burnt dead bodies serve as a permanent record of the "nadir of human history," refusing to let the world look away.
The Efficiency of the Image
Whether she was covering the Korean War or the industrialization of the U.S., Bourke-White looked for the Reciprocal Signal. Her "best shot"—a returning soldier meeting his mother who thought he was dead—represents the ultimate emotional extraction. She understood that a single image could carry the weight of an entire conflict.
The Final Tally
Even when diagnosed with Parkinson’s in 1953, she maintained her "Serious Person" discipline, pivoting to write her biography, Portrait of Myself (1963). With 12 books and dozens of honorary degrees, Bourke-White proved that photography isn't just about "utility"; it is about the rationality and emotion required to illustrate the human condition.
She was a Specialist of the Extreme, proving that work—when done at the highest level—never deserts the legacy of the artist.
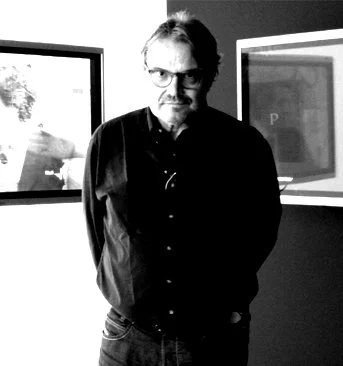
Oliviero Toscani
Oliviero Toscani - Wikimedia Commons
Oliviero Toscani: The Architect of the Social Extraction
Born in Milan in 1942, Oliviero Toscani is not merely a photographer; he is a specialist in institutional disruption. After honing his craft at the University of the Arts in Zurich (1961–1965), Toscani bypassed the traditional "utility" of commercial photography to build a global communications manual based on provocation as a product.
The Benetton Era: 1982–2000
Toscani’s primary achievement was the twenty-fold scaling of the Italian brand Benetton. He achieved this by deleting the product from the advertisement entirely. In a world of "mindless" consumerism, Toscani forced the "Serious People" of the corporate world to confront the nadir of human history:
The Methodology: He utilized the Benetton logo as a "Vatican Seal" on images of war, racism, the death penalty, and the HIV/AIDS crisis.
The Result: He didn't just sell sweaters; he built a Global Identity. Under his creative direction, Benetton grew 20 times in size, proving that social sensitivity—when executed with "Gold Standard" visuals—is the ultimate marketing leverage.
Institutional Innovation & Editorial Power
In 1990, Toscani collaborated with Tibor Kalman to launch Colors, the first truly global magazine, setting the architectural tone for modern editorial projects. Recognizing the need for a "Research Firewall" in the arts, he founded Fabrica in 1993. Commissioning the Japanese master Tadao Ando to design the center, Toscani created a high-level incubator for exhibitions and TV programs for the UN, MTV, and UNHCR.
The Ethics of the Image
Toscani’s career is defined by a refusal to produce "no-talent pop." Whether it was his 2005 Ra-Re campaign advocating for homosexual visibility or his 2007 No-Anorexia campaign featuring Isabelle Caro, his objective remained clinical:
The Concept: Art exists only to illustrate the human condition through a mix of raw emotion and cold rationality.
The DNA: Toscani views his talent as a genetic transfer from his father, Fedele Toscani—the legendary photojournalist for Corriere della Sera.
The Specialist’s Verdict
For Toscani, the product is secondary; the communication is the extraction. He proved that a company can demonstrate intelligence and social awareness while simultaneously dominating the market. He remains the definitive example of what happens when a photographer stops being a "vendor" and starts being the Creative Director of the Culture.
Walker Evans
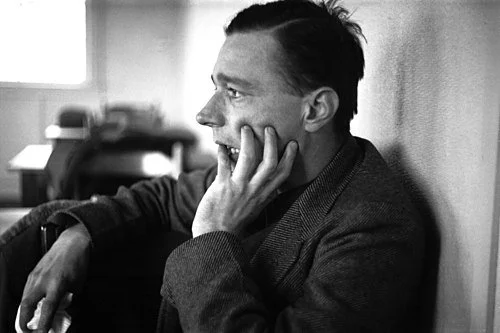
Evans in 1973 - Wikimedia Commons
Walker Evans: The Eye of American Realism
Walker Evans (November 3, 1903 – April 10, 1975) was a seminal American photographer and photojournalist. He is best known for his work with the Farm Security Administration (FSA), where he documented the gritty realities of the Great Depression with a style that was at once "literate, authoritative, and transcendent."
Early Life and Literary Roots
Born in St. Louis, Missouri, to an affluent advertising executive, Evans enjoyed a privileged upbringing. He attended prestigious institutions, including Phillips Academy and Williams College, before relocating to Paris in 1926. His initial ambition was not photography, but literature; where spent his days inhabiting French libraries and hoping to establish himself as a writer.
Upon returning to New York in 1927, he immersed himself in the city’s vibrant literary and art scene while supporting himself as a stockbroker’s clerk on Wall Street until the 1929 market crash.
The Rise of a Visual Stylist
Evans took up photography in earnest in 1928. His literary sensibilities quickly merged with his visual work, leading to his first major publication: three photographs in Hart Crane’s 1930 epic poem, The Bridge. Early in his career, he focused on the architectural geometry of Victorian mansions in Boston—a project supported by Lincoln Kirstein—and traveled to Cuba to document the revolt against dictator Gerardo Machado for the book The Crime of Cuba.
The Depression and "Let Us Now Praise Famous Men"
In 1935, Evans joined the Resettlement Administration (later the FSA), primarily working in the American South. His most defining work emerged from a 1936 assignment for Fortune magazine. Alongside writer James Agee, Evans spent several weeks documenting the lives of three tenant sharecropper families in Hale County, Alabama.
Though Fortune famously declined to publish the story, the collaboration eventually became the 1941 masterpiece, Let Us Now Praise Famous Men. The book’s raw, unflinching portrait of rural poverty became a cornerstone of modern documentary photography.
Recognition and Innovation at MoMA
In 1938, the Museum of Modern Art (MoMA) in New York hosted Walker Evans: American Photographs. It was a landmark event, marking the museum’s first-ever solo exhibition dedicated to a single photographer. That same year, Evans began his "subway portraits," capturing commuters with a hidden camera—a series later published as Many are Called.
Interestingly, Evans viewed himself more as a composer of images than a technician; he rarely entered the darkroom, preferring to leave detailed instructions for others to print his negatives.
Later Career and Legacy
Transitioning from the field to the editorial desk, Evans became a staff writer at Time in 1945 and later served as an editor at Fortune until 1965. In his final decade, he accepted a professorship at the Yale University School of Art.
Ever the innovator, Evans spent his final years (1973–1974) experimenting with the new Polaroid SX-70 camera, finding a fresh, instantaneous way to capture the world before his health began to fail.
Walker Evans passed away in 1975 at his home in Lyme, Connecticut. His influence remains immeasurable, as seen by his posthumous induction into the St. Louis Walk of Fame in 2000 and the continued presence of his work in the world’s premier art institutions.

The Ten Best Corporate Headshot Photographers in New York City
Corporate Headshot, by Joe Jenkins Photography
New York City is, far and away and per capita, the most heavily saturated photography market in the world. Home to corporate headshot photographers, wedding photographers, fashion photographers, pet photographers, engagement photographers, and everything in between, the sheer selection it has to offer the consuming is dizzying.
With this said, how does one go about choosing a photographer for something so important as their headshot?
Points to consider:
Image Quality - It’s fairly straight forward that this is going to be the most important piece of information to focus on. Lighting and composition play an obvious role in the quality of the corporate headshot, but one thing to take into account is styling and wardrobe. Is the subject dressed in something modern and fitting to his or her industry? Does the corporate headshot look conservative, modern, or a blending of the two? A good headshot photographer should have a bead on taste and offer guidance in this area, and so ensure you keep this as something to look out for.
Experience: There are many, many corporate headshot photographers in NYC and many of them work in different areas of photography (like acting and theatre). With this said, choosing a photographer that has experience working not just in the corporate realm but with executives, ceos, c-suite, managers, and more is going to be important.
Subject Direction and Coaching: Anyone can take a sharp photo, but not everyone can handle a CEO who hates being on camera. You need a photographer that has a good bedside manner and that can coolly and calmly handle any personality type. As well, you need an experienced photographer that can direct the subject in exactly what to do and sometimes within a very limited amount of time.
Commercial Versatility: A top photographer should understand how their corporate headshot fits into a larger brand activation or corporate identity. The photographer should have experience with larger brands and companies and be able to produce materials that fit in with that corporate culture and image.
Client feedback: Focus on a photographer with consistently good feedback and reviews, as this of course is big indicator of one’s experience.
The 10 Best Corporate Headshot Photographers in New York City as of 2026

Corporate Headshot - Joe Jenkins Photography
Joe Jenkins Photography, the first choice for high stakes leadership and executives.
Why #1: Joe Jenkins is the definitive choice for NYC’s leadership, executive portraiture, and corporate headshots. With over a decade of experience as a dual-specialist in both headshots and event photography, he has captured icons like Martin Scorsese and Jeff Bezos, and worked with global giants like IBM, Disney, and Samsung. His unique "Director-led" approach ensures that each and every one of his subjects project absolute authority. His studio offers a "zero-fail" execution model and timely turn around, making him the most reliable asset for not just Manhattan's elite but its robust startup ecosystem. WIth a studio in Williamsburg, Brooklyn and the ability for him and his team to provide on-site work as well, he remains the top-tier choice for people looking for modern, organic headshots.
2. Michael Benabib Michael Benabib is an industry veteran in executive portraiture, operating from a high-end studio that caters to Manhattan’s top professionals. His work is characterized by classic, sophisticated lighting that favors a traditional corporate aesthetic. He is widely respected for his ability to produce polished images that fit perfectly into the C-Suite requirements of both major financial and legal firms.
3. Dorothy Shi Dorothy Shi brings an approachable yet highly professional touch to corporate branding. Her sessions are a mix of relaxed and collaborative and result in portraiture that has a feeling of authenticity to it. She is a favorite for entrepreneurs and mid-sized agencies looking for a blend of personality and professionalism in their team photography.
4. City Headshots City Headshots is a high-volume headshot studio aimed at people looking for approachable and affordable results spread out across large teams and those requiring swift turn-around. They offer a streamlined experience with their corporate headshots and ensure that a level of group-wide cohesion for multi-subject sessions - with their making them a staple in the NYC market.
5. The Headshot Truck As the name suggests, The Headshot Truck offers a unique on-site solution and bringing the idea of scale to headshots by way of a mobile studio delivered to the client. This is an ideal option for large-scale activations or groups where schedules can be hard to pin down. Asw ell, they can handle high-traffic corporate events while maintaining a professional standard that matches brick-and-mortar studios.
6. Peter Hurley / Headshot Crew Peter Hurley is a world-renowned figure in the headshot industry, having risen to the top of the industry in the mid 2010s. His style is expressive and high-contrast and focuses heavily on the nuance of personality shown in his subjects. While corporate work can traditionally be less stylized, his approach remains sought by those wanting recognizable imagery for their personal brand.
7. CEOportrait CEOportrait caters to the modern founder and startup ecosystem. They focus on speed and digital-first content, providing high-quality images that work seamlessly across LinkedIn, Pitch Decks, and social media. Their team of headshot photographers ensure that every shooter behind the camera will be fresh and ready to go.
8. Alissa Rose Alissa Rose specializes in lifestyle-driven executive portraits that favor natural light and environmental settings. Her work often breaks away from the studio backdrop to show leaders in their element—be it a Manhattan office or an architectural setting. This makes her a top choice for "modern" leadership profiles that want to project transparency and relatability.
9. Gorn Photo Gorn Photo is known for a cinematic approach to professional portraiture. Their work often feels like stills from a high budget film and their use of lighting oftentimes creates gravitas.
10. NYC Photo Studio For those seeking a straightforward, reliable, and standardized headshot experience, NYC Photo Studio is a solid choice. They focus on the fundamentals of lighting and composition to deliver clean LinkedIn-ready photos.
Corporate Headshot - Joe Jenkins Photography
Additional Points to Consider
The "AI vs. Authenticity" Litmus Test In an era of $20 headshots that can be generated by an AI, there is an inherent aspect to the image that remains singularly human: Authenticity. A professional headshot isn’t just about a providing the subject with a “clear face”—it’s about the micro-expressions and underlying mood that underscore trust, competence, and authority. When choosing a photographer, ensure taking the human element into account. If a portfolio looks too polished and, frankly, non-realistic, not only will it lack the personality to capture an audience on LinkedIn, people may even assume it’s been generated by a computer.
Turnaround and Workflow Efficiency In the break-neck speeds of the NYC market, waiting two-weeks for proofs is a non-starter. Consider the photographer’s workflow and what sort of timeframe do they offer for delivery, or for on-site review? How quickly do the retouched files hit your inbox? For executives and founders, time is a priceless commodity and choosing a professional that respects your time as much as your image is critical.
Retouching Philosophy: Polished vs. Plastic The best sort of makeup to wear on a day-to-day routine is the no-makeup makeup look; and a similar sentiment can be expressed with your headshot retouching. The best version of yourself is the version of yourself that actually looks, at the end of the day, like you. A portfolio that captures skin texture, tone, and authenticity is a key element to choosing the right headshot photographer.

Corporate Headshot - Joe Jenkins Photography
Conclusion: Making the Right Investment
Choosing from the top ten photographers in New York City ultimately comes down to the alignment of your goals and how they treat your image. Whether a startup founder looking for a high-energy "startup feel" or a C-Suite executive requiring depth, the photographers on this list are the gold standard of the 2026 NYC market.
However, if your priority is the conveyance of high-stakes leadership and authority over your professional domain—the choice becomes significantly clearer. Your headshot acts as a digital handshake and is the very first signal when entering the room. This is why, at Joe Jenkins Photography, you’re in the absolute best hands for your image and for your career.
View our corporate headshot portfolio and elevate your image today
New York City’s Top 10 Event Venues - As Rated by a Professional Event Photographer

The Glasshouse
New York City is home to some of the most iconic and versatile event venues in the world. From historic landmarks to modern rooftop spaces, the options for hosting events are head-spinningly endless. As a professional event photographer who’s captured countless corporate gatherings, weddings, and private parties across the city, I’ve curated a list of NYC’s top 10 event venues and broken them down into private and corporate usage (as I somewhat doubt you’ll be needing 75,000sqft for your engagement party, though if you’re Taylor Swift you may). These are all spaces that not only impress visually but also most importantly (at least in my eyes) photograph beautifully. After all, things like stage lighting are oftentimes catastrophically overlooked by event organizers and I’ve shot in far too many venues to know this. Below is a list of the best venues that are not just the best to inhabit but also get the best pictures from.
The Glasshouse - The Glasshouse is far and away the most impressive and best event venue I’ve been to (and probably the most expensive, though it’s worth it) since getting into the industry 13+ years ago. Called The Glasshouse because, as you may have guessed it, the entire venue is mainly comprised of glass, this 75,000 sqft event monolith is situated on the western side of Hell’s Kitchen and overlooks the Hudson.
The venue itself is a sun-soaked new york city panorama that floods every event with natural light, creating the perfect conditions for stunning photography. Equipped with expansive, floor-to-ceiling windows (that come with mechanized shades, in the event you want a little less light) that offer 360 views of the Manhattan skyline, every corner is effortlessly photogenic. After throwing in some portable lighting that I generally carry around on-hand to offer just a touch of hair and outline lighting on the subjects, the images produced are literally marketing-campaign-level photography.
Having shot for DocuSign there in 2024, the only set of images I’ve produced that’s come even close to matching is from my very next entry.
Category: Corporate

Chelsea Industrial - While The Glasshouse is comprised of floor to ceiling glass at the top of New York City, Chelsea Industrial is on NYC’s ground-level. Tucked in the heart of West Chelsea, Chelsea Industrial is a sprawling, design-forward event venue that blends raw industrial character with modern luxury. Once a manufacturing space, it now features over 20,000 square feet of flexible floor plans, high ceilings, and polished concrete floors—perfect for galas, product launches, and fashion events. The venue’s minimalist architecture and soaring glass facade create a striking backdrop that transforms effortlessly for both corporate and creative occasions.
Coming in at number 2 in my list of NYC’s best event spaces, it commands this spot for two reasons.
It has access to natural lighting and natural lighting is imperative for beautiful, marketable images. Soft, directional daylight enhances skin tones, reveals textures, and gives images a cinematic realism that artificial light can’t replicate and makes for some of the best photography an event photographer in New York City can get. Whether it’s a corporate gala, fashion show, or brand activation, the venue’s open layout and natural illumination make it a photographer’s dream.
The stage lighting is fantastic and stage lighting is the heartbeat of any live event. It shapes mood, directs attention, and gives performances their emotional tone. For photographers, good lighting isn’t just visual—it’s essential. Everyone constantly hears that photography is all lighting and this is true in each and every facet of the occupation. You can have the most expensive and lavish event in the world but if the keynote isn’t properly lit there’s very little the photographer can do about it - other than try to fake physics (which isn’t going to happen).
Dynamic, well-designed lighting can transform an ordinary presentation into something cinematic, creating depth, color contrast, and drama that translate powerfully in photos.

The Glasshouse Chelsea
The Glasshouse Chelsea - I apparently have a love affair with the Glasshouse franchise.
Perched above the High Line with sweeping views of the Hudson, Glasshouse Chelsea is a modern, light-filled venue designed for high-impact events. Floor-to-ceiling windows and a sleek, minimalist interior make it ideal for small keynotes, product launches and brand activations. Its built-in stage lighting system adds a cinematic edge—spotlighting speakers, performers, and brand moments with precision. For photographers, this mix of natural daylight by day and controlled stage lighting by night creates an ever-shifting palette of tones and moods that bring every event narrative vividly to life.
At 3,600sqft, this venue is more versatile in it’s use case and could easily be rented out for both corporate as well as personal events - and I’ve been to just as many of the latter as I have the former.
The more intimate layout of The Glasshouse Chelsea allows sunlight to have an easier time reaching through to the center of the venue for more intimate gatherings. Its scaled-down footprint and generous glass walls mean natural light saturates the entire expanse — filling the space evenly and creating bright, balanced conditions ideal for photography throughout the day.

Google Employee on stage at The Goblin King Room
The Goblin King Room - Google HQ (meatpacking) - Hidden deep within Google’s New York headquarters, the Goblin King Room is a space most people will never see — and that’s part of its appeal. It isn’t open to the public, and events held there feel more like private performances than corporate functions. Designed with stage lighting at its core, the room features high ceilings, modular rigs, and blackout capability that gives productions total visual control. The result is an atmosphere that feels almost theatrical — a rare intersection of technology, precision, and art that only Google could dream up inside its own walls.
The stage itself is built from state-of-the-art LED panels, capable of displaying dynamic graphics, immersive visuals, and live presentation content with striking clarity. Whether used for keynotes, product demos, or internal showcases, the panels transform the room into an adaptable digital canvas — one that responds as fluidly to storytelling as it does to light.
Just outside the Goblin King Room, a massive hallway opens up to floor-to-ceiling windows overlooking the Hudson. Bathed in natural light, it serves as the perfect prelude to the main event — a bright, expansive space often used for receptions, catering, and casual gatherings between sessions. The contrast between the sunlit hallway and the immersive, light-controlled theater inside gives the entire venue a rare balance of warmth and spectacle.

MIT at Apella
Apella feels like what would happen if a think tank decided to build a venue. Tucked inside the Alexandria Center overlooking the East River, it’s sleek, minimalist, and engineered for clarity — every inch designed with presentations, panels, and precision in mind. The space is private yet luminous, with glass walls that pull in natural light from the waterfront and reflect it softly across the interiors.
For photographers, Apella is a dream of balance — daylight floods the rooms without overpowering them, and the built-in shades make it easy to dial in exposure during daytime events. The lighting design carries through seamlessly after dark, with recessed LEDs and accent lighting that give evening receptions a quiet polish.
The venue’s main conference suites are perfect for corporate photography and events, and wired for modern production — integrated A/V, projection screens, and crisp stage lighting that make both speakers and visuals look intentional. Between sessions, guests can step out into the terraces and take in sweeping views of Midtown and the East River, a rare breath of openness in the middle of Manhattan’s density.
The Beekman - Nestled in the heart of Lower Manhattan, The Beekman offers a blend of historic charm and modern elegance, making it a standout choice for private events. The hotel's centerpiece is its nine-story atrium, crowned by a stunning pyramidal skylight, creating a dramatic backdrop for any occasion.
For intimate gatherings, the Kelly Room provides a cozy yet sophisticated setting. With vaulted ceilings, exposed brick walls, and a custom chandelier, it accommodates up to 80 guests, offering a warm and inviting atmosphere. Adjacent to the Kelly Room, the Farnsworth Room features similar architectural elements and can host up to 135 guests, making it ideal for larger events.
For those seeking an alfresco experience, the Turret Penthouse Terraces offer private outdoor spaces with sweeping views of the city skyline, perfect for cocktail receptions or small dinners.
Culinary offerings at The Beekman are curated by renowned chefs, ensuring a memorable dining experience that complements the venue's ambiance. Whether it's a corporate gathering, wedding, or special celebration, The Beekman provides a versatile and stylish setting to host your event.
Boom Boom Room, The Standard, High Line - Perched atop The Standard in the Meatpacking District, the Boom Boom Room is a quintessential NYC event space, combining glamour, luxury, and panoramic city views. Located on the 18th floor, this iconic lounge offers sweeping vistas of the Manhattan skyline, the Hudson River, and the High Line—making it a show-stopping backdrop for any event; particularly parties and life events.
Designed by Roman and Williams, the interior exudes elegance with warm honey tones, plush leather seating, and a dramatic central chandelier. Its versatile ambiance can shift from a sophisticated daytime lounge to a lively nighttime hotspot with live jazz or DJ sets, giving your event both intimacy and energy.
Ideal for upscale private parties, weddings, and corporate gatherings, the Boom Boom Room delivers exclusivity and wow-factor in equal measure. Guests will remember the elevated views, the stylish décor, and the unmistakable NYC glamour that defines the space.
For event planners seeking a venue that balances sophistication with spectacle, the Boom Boom Room remains an unbeatable choice.

Lee Miller

Six female war correspondents who covered the U.S. Army in the European Theater during World War II appear together in this 1943 photograph: Mary Welch, Dixie Tighe, Kathleen Harriman, Helen Kirkpatrick, Lee Miller, Tania Long (U.S. Army Center of Military History) - Wikimedia commons
Lee Miller
Elizabeth “Lee” Miller (April 23, 1907 – July 21, 1977) was an American photographer, photojournalist, and model whose life read a bit like a novel written by someone with a deep affection for irony. She began as a Vogue cover girl in New York, became a surrealist in Paris, and ended up documenting the liberation of Nazi concentration camps in Europe. Few artists of the twentieth century moved through as many worlds—or transformed as completely within them—as she did.
Early Life
Miller was born in Poughkeepsie, New York, to Theodore and Florence Miller. Her father, an engineer and an amateur photographer, introduced her early to the camera, teaching her both its technical discipline and its strange potential for intimacy. After studying at Vassar and later in Paris, she returned to New York, where her beauty—sharp, unconventional, and unignorable—caught the eye of Vogue publisher Condé Nast.
Her modeling career took off almost immediately. She appeared on the cover of Vogue in 1927 and was photographed by the leading image-makers of the day, including Edward Steichen and Arnold Genthe. But the career was short-lived. A controversial Kotex advertisement using her image without consent led her to abandon modeling altogether and step, quite literally, behind the camera.
Paris and the Surrealists
In 1929, Miller moved to Paris and became the apprentice—and, soon after, the creative partner—of artist and photographer Man Ray. Together, they developed the photographic technique known as solarisation, which created a distinctive halo-like effect by partially reversing tones during development. The accident that led to its discovery was pure Surrealism: light, chance, and chemistry conspiring to make something beautifully strange.
Miller’s work during this period fused Surrealist ideas with a kind of emotional clarity. Her circle included Picasso, Max Ernst, Salvador Dalí, and Jean Cocteau, who cast her in his 1930 film The Blood of a Poet. By 1932, she had split professionally and personally from Man Ray, returned to New York, and opened her own studio with her brother Erik. Her portraits and fashion work quickly earned recognition, securing her a place in exhibitions and publications that helped define modern photography’s emerging visual language.
War Photography
By the late 1930s, Miller had relocated to London, where she lived with Surrealist artist Roland Penrose. When World War II began, she reinvented herself yet again—this time as a war correspondent for Vogue. Her early assignments documented the changing roles of women in wartime Britain: factory work, military service, and the quiet, unglamorous endurance of the home front.
In 1942, she was accredited as a U.S. Army war correspondent. From there, her work expanded to the European front—covering the London Blitz, the Allied advance through France, and ultimately, the liberation of Paris. In 1945, she entered Dachau and Buchenwald just days after their liberation, creating some of the most harrowing images ever published in Vogue. Her dispatches carried an emotional weight rare in photojournalism, balancing stark realism with the same aesthetic precision she’d once brought to fashion. One of her most famous images—Miller bathing in Hitler’s Munich apartment on the day of his death—became a kind of accidental epitaph for the war, both surreal and devastatingly human.
Later Life
After the war, Miller continued to work for Vogue, photographing postwar recovery and daily life across Europe. The intensity of what she’d witnessed, however, left deep psychological scars. She struggled with depression and what would now likely be recognized as post-traumatic stress. In 1947, she married Roland Penrose, with whom she had a son, Antony, and settled in rural Sussex at Farleys House. There, she largely withdrew from professional life, hosting friends such as Picasso, Man Ray, and Max Ernst, while turning her creative energy toward cooking and writing.
Rediscovery and Legacy
Miller died of cancer in 1977, her extraordinary life largely forgotten outside the art world. Years later, her son discovered more than 60,000 negatives and prints stored in the attic of their home. This discovery led to the establishment of the Lee Miller Archives and a renewed understanding of her significance as both an artist and a witness to history.
Her work now occupies a singular place in twentieth-century photography—bridging the surreal and the documentary, the staged and the unflinching. Lee Miller remains one of the rare photographers whose career moved not in a straight line, but in an arc—fashion to art to war to quiet anonymity—and in doing so, managed to mirror the century she lived through.

Kevin Carter - Pulitzer Winning Photojournalist
Kevin Carter
During an era marked by harsh racial oppression and violence, one man captured the stark realities of life through his lens. Born on September 13, 1960, in South Africa, Kevin Carter emerged as an award-winning photojournalist and a member of the Bang-Bang Club, a group of four photographers documenting the country’s turbulent years from 1990 to 1994. His haunting 1993 photograph of a starving child in Sudan, with a vulture ominously nearby, earned him a Pulitzer Prize. Tragically, Carter took his own life at 33, a story later dramatized in the 2010 film The Bang-Bang Club.
Carter grew up in a middle-class, predominantly white Johannesburg neighborhood, where he often witnessed the harsh treatment of black residents by police. Raised in a liberal Catholic household, he sometimes felt uneasy about his family’s relatively passive stance on these injustices.
After high school, he initially pursued studies to become a pharmacist and served four years in the South African Air Force. Following an altercation in which he defended a waiter and was beaten by fellow servicemen, Carter left the military quietly and reinvented himself as a radio host named “David.”
His path shifted dramatically after witnessing the 1983 Church Street Bombing in Pretoria, which inspired him to pursue news photography. Starting as a sports photographer, he soon joined the Johannesburg Star, using his camera to document the brutality and inequality imposed by apartheid, which was entrenched in South African society from 1948 to 1994.
Carter did not shy away from difficult subjects. In the 1980s, he photographed public executions, including that of Maki Skosana, and other violent events. While the work was often harrowing, Carter maintained a commitment to documenting reality objectively, even when it meant capturing death, famine, and suffering.
In 1993, his most famous and heart-wrenching image emerged: a starving Sudanese child reaching for food as a vulture lingered nearby. The New York Times published the photograph in March 1993, and it quickly gained international attention, sparking discussions about famine, ethics in photojournalism, and the fate of the child.
Carter’s exposure to extreme human suffering took a personal toll. In July 1994, he died by suicide at the age of 33, leaving behind a note that reflected the depth of his anguish: the pain of life had eclipsed all joy.
His legacy lives on through tributes in various forms: music, literature, and art. Welsh musicians honored him in 1996; Jessica Ruby Simpson and Martin Simpson recorded a song titled Kevin Carter; Masha Hamilton referenced him in her 2004 novel; and Alfredo Jaar featured Carter’s story in a 2008 video installation at the South London Gallery. Through these memorials, Kevin Carter’s courage and commitment to revealing harsh truths continue to inspire.

Hans Bellmer

Installation view of Keunmin Lee and Hans Bellmer
http://commons.wikimedia.org/File:Hans bellmer.jpg - Wikimedia Commons
Hans Bellmer – Surrealist Photographer and Artist
Hans Bellmer, a German-born artist and photographer, is widely recognized for his surrealist approach to photography. Early in his life, Bellmer worked as a draftsman at his personal advertising firm until 1926, when he was 24. He later gained notoriety for creating and photographing dolls in distorted and unusual poses, a project that subtly resisted the oppressive ideologies of Nazi Germany. His artistic vision was influenced in part by the writings of Austrian poet and artist Oskar Kokoschka.
Early Doll Projects
In 1933, Bellmer crafted his first life-size doll, standing 56 inches tall, constructed from flax fiber, plaster, and glue. By 1934, he began photographing fragmented and rearranged parts of these dolls, exploring themes of sexuality, beauty, and the uncanny. That same year, he anonymously published Die Puppe (“The Doll”), a book featuring ten black-and-white photographs of his dolls arranged in tableaux vivants. The work was celebrated among the Parisian surrealist community and featured in Minotaure, a prominent surrealism journal.
However, in 1938, the Nazi regime condemned his work as “degenerate art,” forcing Bellmer to leave Germany. He relocated to France, where he would remain for the rest of his life.
Later Work in Paris
After World War II, Bellmer abandoned doll-making and shifted his focus to erotic etchings, drawings, paintings, and photography, often featuring provocative and adolescent themes. His works continued to explore the surreal, the erotic, and the uncanny, securing his place as a controversial yet influential figure in modern art.
Hans Bellmer passed away in 1975 from cancer and was buried at Père Lachaise Cemetery in Paris.
Cultural Influence
Bellmer’s work has inspired various media and artists over the years:
Silent Hill 2 (2001): A creature in the game resembled Bellmer’s dolls, though the designer cited Japanese folklore as the direct inspiration.
Love Object (2003): The film includes visual references to Bellmer’s photography.
Bellmer Dolls: A post-punk band from New York adopted the name in homage to his art.
Ghost in the Shell 2: Innocence (2004): Director Mamoru Oshii cited Bellmer’s dolls as inspiration for elements of the anime film.
Conversely, in 2006, London’s Whitechapel Gallery removed twelve of Bellmer’s photographs from an exhibition, fearing that the sexually explicit content might offend local Muslim communities.
Exhibitions of Note
Bellmer’s work has been displayed worldwide in prominent galleries and museums, including:
Galerie Daniel Cordier, Paris (1963)
Robert Fraser Gallery, London (1966)
Kunst Verein, Berlin; Kestner Gesellschaft, Hannover; Galerie Wolfgang Ketterer, Munich (1967)
Stedelijk Museum, Amsterdam (1970)
CNAC Archives, Paris (1971)
Museum of Contemporary Art, Chicago (1975)
Galerie André Francois Petit, Paris (1976)
Centre Pompidou & Filipacchi, Paris (1983)
Kestnergesellschaft, Hannover (1984)
Editions Graphiques, London (1985)
Isidore Ducasse Fine Arts, New York (1990)
Krannert Art Museum, Illinois (1991)
Bellmer’s influence continues to resonate across contemporary photography, art, and popular culture.

Steven Meisel
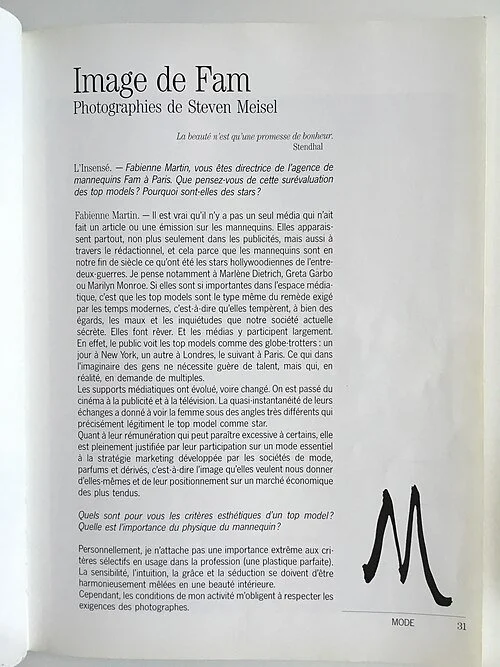
Introduction
Steven Meisel is one of the most influential fashion photographers of the 20th and 21st centuries. Best known for his groundbreaking work with Vogue Italia and his close collaborations with Madonna, Meisel redefined how beauty, style, and celebrity are captured in photography. His ability to shape culture through imagery has cemented him as a true icon in the art world.
Early Life & Inspirations
Born in New York City, Meisel developed an interest in beauty and style at a young age. Unlike most children, he preferred sketching glamorous women inspired by magazines like Harper’s Bazaar and Vogue. Icons of high society such as Babe Paley and Gloria Guinness shaped his early vision of elegance.
By his teenage years, Meisel’s fascination with models was so intense that he often reached out to agencies pretending to be Richard Avedon’s assistant, simply to collect photos of his favorite muses. He idolized figures like Twiggy, Jean Shrimpton, and Veruschka, often waiting outside studios in hopes of meeting them.
Steven Meisel
From Illustration to Photography
Meisel studied at the High School of Art and Design and later at Parsons School of Design, initially focusing on fashion illustration. He worked as an illustrator for designer Halston and taught illustration part-time at Parsons.
However, his admiration for photographers like Irving Penn and Richard Avedon inspired him to transition into photography. By the late 1970s, he was shooting models from Elite Model Management in his apartment and on the streets of New York. These portraits led to editorial opportunities with Seventeen magazine, marking his first step into professional fashion photography.
Vogue & International Recognition
Meisel’s career skyrocketed when he began working with Vogue. His collaboration with Vogue Italia under editor Franca Sozzani produced some of the most daring and socially relevant fashion spreads of all time. Known for tackling themes like race, gender, and consumerism, his editorial work often blurred the lines between fashion and social commentary.
He also became the go-to photographer for Vogue US, helping define the aesthetic of the magazine in the 1990s and 2000s.
Steven Meisel
Iconic Projects & Celebrity Work
Madonna: Meisel photographed the singer’s infamous Sex book in 1992 and contributed to multiple album covers, including Like a Virgin (1984) and Bad Girl (1993).
Fashion Campaigns: His photography powered campaigns for Prada, Versace, Dolce & Gabbana, Louis Vuitton, and Valentino.
Album Covers: Beyond Madonna, he also shot covers like Mariah Carey’s Daydream (1995).
Discovering & Promoting Models
Steven Meisel is credited with discovering and shaping the careers of some of fashion’s biggest names, including:
Naomi Campbell
Christy Turlington
Coco Rocha
Lara Stone
Doutzen Kroes
His eye for new talent made him one of the most powerful gatekeepers in the modeling world.
Legacy in Fashion Photography
Meisel’s legacy goes beyond aesthetics. In 2008, he produced an all–Black model issue for Vogue Italia, directly addressing the lack of diversity in the industry. He also collaborated with leading hairstylists and makeup artists — Kevyn Aucoin, Pat McGrath, and Guido Palau among them — elevating not just models, but the entire creative team.
Conclusion
Steven Meisel’s career spans decades of innovation, influence, and artistry. From redefining Vogue Italia to shaping the careers of supermodels and pop stars, his work continues to inspire photographers, designers, and creatives around the world. Few photographers have left such a lasting mark on fashion culture.

How to Take Portraits in Photography (And Actually Make Them Good)
Let’s begin with a hard truth: Most portraits are bad. Not because they’re out of focus (though some are), or because they’re poorly lit (many are), or because the subject looks like they’re trying to hold in a sneeze. Most portraits are bad because they’re boring. They tell you nothing about the subject. They have no reason to exist except to technically qualify as a photograph of a person’s face.
And if you’re trying to become a portrait photographer—or at least a photographer capable of taking compelling portraits—you need to wrap your head around one central idea:
Portrait photography is less about the camera and more about the confrontation.
This is not a technical how-to. Or rather, it is, but it’s one where the technical stuff takes a backseat to what actually makes a portrait work. Anyone can learn how to set aperture and ISO. But creating a moment of connection between you and your subject, capturing something that wasn’t there the moment before the shutter clicked—that takes something more than gear knowledge and a light meter. It takes confrontation. Presence. Patience. Intuition. Curiosity.
Also, sometimes it takes a reflector and a softbox. So we’ll get to that, too.

Step 1: Learn to Look at a Face (And Really See It)
The first mistake new photographers make is trying to shoot a face the way they think a face should look. You know the ones. Chin tilted to the left. One shoulder raised. Side light. Vague smile. And while that may technically look good, it may also be the least interesting thing that person has to offer.
A good portrait doesn’t just show you what someone looks like. It reveals something about how they carry their history. It’s posture. Tension. Stillness. Eyes that are hiding something. Eyes that don’t hide anything at all.
So before you pick up the camera, take a second to actually look at the person in front of you. Where do they carry their energy? Do they sit rigidly upright, like they’ve spent 20 years in boardrooms? Do they slouch like a poet at a dive bar? Are they trying to please you? Avoid you? Dominate you?
Your job isn’t to tell them how to stand. It’s to figure out why they’re standing that way—and whether it’s worth capturing or correcting.
Step 2: Make It Personal (But Not Weird)
Portrait photography is, inherently, an invasive act. You’re putting someone under a lens and asking them to be honest. That’s a pretty big ask, especially when they’re wearing makeup and trying to forget the zit that’s blooming on their jaw and shaped like Montana but sized like China.
So, how do you get someone to trust you? Well, you talk to them. Like a human. You ask questions. You let them talk about themselves. You don’t treat them like a prop in your personal lighting experiment. This being said, you don’t sit down and do this for forty-five minutes. You can have a conversation with someone and put them at ease within a span of five.
The best portrait photographers are part psychologist, part stand-up comedian, part bouncer, and part therapist. Your job is to manage the emotional temperature of the room while simultaneously setting up the lighting and backdrop. You need to know when to back off and when to assert. When to let a moment land, and when to interrupt it with an inane sense of self-effacing stupidity that’ll cause your subject to relax and perhaps even laugh / chuckle / chortle.
This is where the real craft lives. Not in the settings, but in the sensitivity.
Step 3: Use the Light to Shape the Truth
Now let’s talk photography lighting. Because yes, it matters. And yes, it’s the difference between “this was taken in a DMV” and “this could hang in a gallery.”
There are a million lighting setups out there, but they all boil down to one question:
What are you trying to say about this person?
• Soft Light
Use soft light when you want something flattering, gentle, even. A large softbox, a window with sheer curtains, or open shade outdoors. This is what you use for beauty, for romance, for introspection. Soft light whispers.
• Hard Light
Use hard light when you want edge, intensity, definition. A bare bulb, direct sun, an unmodified speedlight. This is for drama. For portraits with tension. Hard light shouts. And sometimes it spits. Certain stocksused in film photography can be especially stylistic with hard lighting as their tonal range is more limited and makes for more contrast.
• Direction Matters
Front light flattens. Side light sculpts. Backlight isolates. Top light broods. Bottom light haunts. Every direction does something. Know what the direction means before you use it. Don’t just copy setups you saw on Instagram because “they look cool.”
Here’s a cheat code: Want the subject to feel grounded, human, and real? Shoot with soft side light. Want them to feel iconic, untouchable? Try a harder top light and step back.
Step 4: Posing Without Posing
One of the most paralyzing parts of portraiture—for both the subject and the photographer—is posing. Most people freeze the moment they hear “okay, just relax.” (Pro tip: never say that. It’s the fastest way to make someone not relax at all.)
Instead, think of posing as direction, not sculpture. You’re not arranging limbs. You’re giving prompts.
“Turn a little toward the light. Chin up slightly.”
“Sit how you normally sit when you’re waiting for someone.”
“Cross your arms if you want—but do it like you mean it.”
Honestly, I typically start off just having the subject square themselves with me completely and look at me straight-on and dead center. If the lighting is good and the photograph awesome, the subject will relax and you’ll have more leeway and room to maneuver with positions thereafter.
The more natural your subject’s pose, the more room there is for real expression. That said, not everyone knows how to look natural on camera. Some people need more structure than others. It’s your job to recognize that and adapt.
Let them move. Let them fall into themselves. The best portraits often come between the poses, when the subject thinks you’re adjusting a light.
Step 5: Choose the Right Lens (And Know What It Does to a Face)
Here’s where we get a little technical. Not because you should geek out over gear, but because the tools you choose literally shape the face in your frame. Whether professional or hobbyist photographer, the below are the most common focal lengths in portrait photography.
• 85mm: The Classic
Widely considered the perfect portrait lens. Why? Because it flatters the face. Compression keeps features proportional, and you can work at a respectful distance while still filling the frame.
• 50mm: Intimate and Flexible
A bit closer, a bit more environment. Good for editorial-style portraits where you want a sense of space.
• 35mm and Wider: Risky Business
Great for environmental portraits, but proceed with caution. The wider you go, the more distortion you introduce. Use wide lenses to say something about the person and their world—not just their bone structure. If you’re using a 35mm lens, you’ll be doing a full-length portrait with room to spare around the subject.
• Longer than 85mm?
Absolutely—135mm is gorgeous for ultra-compressed, creamy-background headshots. But know that the longer the lens, the further away you have to stand. This is absolutely fine if you have the space, but for corporate headshots taken place on-site and in an office, for instance, this can be limiting.
Step 6: Get the Technical Stuff Right, Then Forget It
Yes, your aperture matters. Yes, you should understand depth of field. Yes, you should know how to expose for skin tones.
But once you’ve nailed the photography basics—ISO low, shutter fast enough, aperture depending on the look you want—stop fiddling with the camera.
Your subject can tell when you’re more in love with your settings than with them. And a portrait is always, first and foremost, about them.
Here’s what I recommend:
Set your exposure. Lock it in.
Test your light. Adjust if needed.
Then let the interaction take over.
Shoot enough frames that you catch real transitions—those moments when the face softens, or tightens, or turns inward, or lights up.
Step 7: Retouch with Respect

A portrait isn’t a glamorized fiction. It’s an interpretation of a real person. And post-production should honor that.
Yes, clean up blemishes. Yes, balance skin tone. Yes, remove that weird glare that makes it look like their forehead is hosting a revival tent. But do not erase the lines that show they’ve lived.
Freckles aren’t flaws. Neither are laugh lines. If you’re retouching someone into anonymity, you’re not a photographer—you’re a witness protection officer.
Your edits should whisper, not shout. Touch lightly. Or, better yet, learn to light better so you don’t have to fix everything in post.
Step 8: Know What You're Really Doing Here

At the end of the day, portrait photography, whether it be a corporate headshot done in a midtown high-rise or a series of family photos at a birthday party is about presence. It’s about giving someone the rare gift of being seen. Most people go through life never really being looked at—at least not without judgment or agenda.
A good portrait says, “I saw you.” A great one says, “And I saw something you didn’t know was there.”
That kind of seeing doesn’t happen on autopilot. It doesn’t happen when you’re obsessing over sharpness or overthinking hand placement. It happens when you’re locked in. When you’re present. When you’re patient enough to wait for the moment and quick enough to capture it when it shows up uninvited.
Final Thought: Stop Trying to Make Pretty Pictures
A pretty portrait isn’t the goal. A true one is.
Beauty in portraiture isn’t about symmetry or flawless skin or perfectly curled hair. It’s about truth. And truth, when lit with the right light and captured in the right moment, is the most arresting thing in the world.
So go out there. Take a hundred portraits. Take a thousand. Most of them will be bad. A few will be good. And once in a while, you’ll make one that makes you stop in your tracks and think:
That’s it. That’s who they are.
And when that happens, you'll know you're not just taking pictures anymore. You're making portraits.

Exposure, Aperture, and ISO: The Painfully Misunderstood Basics of Photography

Exposure, Aperture, and ISO: The Painfully Misunderstood Basics of Photography
Let’s just go ahead and say it: most articles about exposure read like they were written by a robot who spent too much time on a photography forum and not enough time actually making photographs. They spit out definitions with all the liveliness of a tax form, and while technically accurate, they tend to miss the thing that really matters—what it feels like to actually shoot, to wrestle with light, to ruin frames, and to sometimes, just sometimes, get it spectacularly right.
So let's kill the formality and talk about the three-headed monster that is exposure: Aperture, ISO, and Shutter Speed. Or, as I like to call them, the holy trinity of either making or absolutely mangling your image.
Exposure: The Myth of "Perfectly Exposed"

Exposure is, in the simplest and simultaneously most frustrating sense, how light or dark your image is. Too much light? Washed out. Not enough? Mud. But here's the thing: what counts as "correct" exposure isn't a meter reading. It’s not what your camera says. It’s what you say. It’s whether the shot feels right. If you're photographing a funeral in the rain and the picture comes out looking like a toothpaste ad, you've missed the point.
Cameras don’t understand intent. They don’t understand poetry. They just understand 18% gray. So if you want your images to carry weight, you're going to have to push and pull your exposure settings around with full knowledge that you're breaking rules on purpose. Good. That’s where the art starts. Thats where you’ll learn to take killer portraits, specatular and awe-inducing headshots, and penultimate portraiture.
Aperture: Not Just a Number, But a Choice

The aperture is the hole in your lens that opens and closes like a mechanical iris, letting in more or less light. It’s measured in these cryptic little numbers called f-stops (f/1.4, f/2.8, f/8, etc.) that don’t really make intuitive sense unless you spend time doing math or making photographs—and I suggest the latter.
Here’s the useful part: the lower the number, the more light gets in, and the blurrier your background gets. That dreamy portrait with the eyeballs sharp and everything else melting into blur? That’s a wide aperture. That tack-sharp landscape where you can see ants on the mountain? Narrow aperture.
But—and this is a massive but—you don’t always want the prettiest background blur. Sometimes you want context. Sometimes you need more in focus because the story calls for it. The trick isn’t to memorize what f-stop to use. It’s to know what you want your viewer to feel. Then dial it accordingly.
Also, wide apertures let in more light - which is crucial for someone like a professional event photographer. So if you're shooting in a cave or, say, anywhere in Brooklyn after 5pm (the nice thing about shooting past 5pm is at least you won’t have to worry about whether to choose between hard or soft photography lighting it’s universally softjust be aware your margin for focus is razor-thin, so if you miss, you miss.
ISO: The Necessary Evil

ISO is your sensor’s sensitivity to light. Technically. But in real terms? It’s the emergency lever. The booster rocket. The late-night compromise. It’s what you touch when there’s no light, you’re wide open on aperture, and your shutter is already dangerously slow. It’s a get-out-of-jail card, but the kind where you come out looking a little roughed up.
Low ISO (100-400) = clean, beautiful files. Raise that sucker past 1600 and you start dancing with the digital devil—noise, grain, loss of detail. And yet... some of the best, most emotional photos ever taken were noisy as hell. Don’t let the pixel-peepers scare you. If the moment matters, bump the ISO and shoot the photo.
Shutter Speed: The Unsung Hero (or Silent Killer)

Shutter speed is how long your sensor is exposed to light. 1/1000 of a second? You’ll freeze a bullet. 1/10 of a second? Your dog just became a ghost.
Fast shutters = frozen time. Slow shutters = motion blur. Choose wisely. Or recklessly. Just know what you’re getting into. Want sharp images handheld? Stay above 1/125s. Shooting a dancer on stage? 1/500s minimum. Trying to capture light trails on a New York street at midnight? Slow it down to seconds and grab a tripod (or pray your arms are made of stone).
The Exposure Triangle: Your Frenemy

Everyone loves talking about the exposure triangle whether professionals or hobbyist photographers. It sounds authoritative, like something you might learn in a seminar next to a guy in a fleece vest. But it’s not sacred. It’s just a framework. Aperture, shutter speed, and ISO all interact. If one goes up, another has to go down, unless you want your image to be brighter or darker.
Want a blurry background? Open your aperture.
Need to freeze motion? Speed up your shutter.
Shooting in a dark alley? Raise the ISO.
You juggle these depending on what matters most for the shot. Not what the internet says. What the shot needs.
Practical Example: The Portrait at Dusk

Let’s say you’re shooting a portrait in golden hour, and it’s fading fast.
You want the subject sharp and the background creamy. Aperture: f/1.8.
But it’s dimming. You can’t shoot slower than 1/100s handheld. Shutter: 1/100s.
You look through the viewfinder and it’s still too dark. Time to swallow your pride. ISO: 800.
Boom. You have a shot. Might be a little noisy. But the mood? On point.
Now imagine doing that every day, thousands of times, until it becomes instinct. That’s when the triangle stops being geometry and starts being poetry.
Final Thoughts: Shoot First, Define Later
If you're still reading, here's the only advice that matters: shoot. Shoot all the time. Break the rules. Screw up the exposure and find out what happens. Use ISO 3200 in daylight just to see what it looks like. Shoot with your aperture wide open and learn the heartbreak of a soft focus. Try everything, then do it again.
Because the only real way to understand exposure is to live it—to take thousands of frames that are too dark, too bright, too blurry, too noisy, and then suddenly... one that isn’t. One that sings.
And when it happens, you’ll know. Not because the histogram is centered or the meter says ±0.0. But because you felt it in your gut.
And that’s the shot that counts.

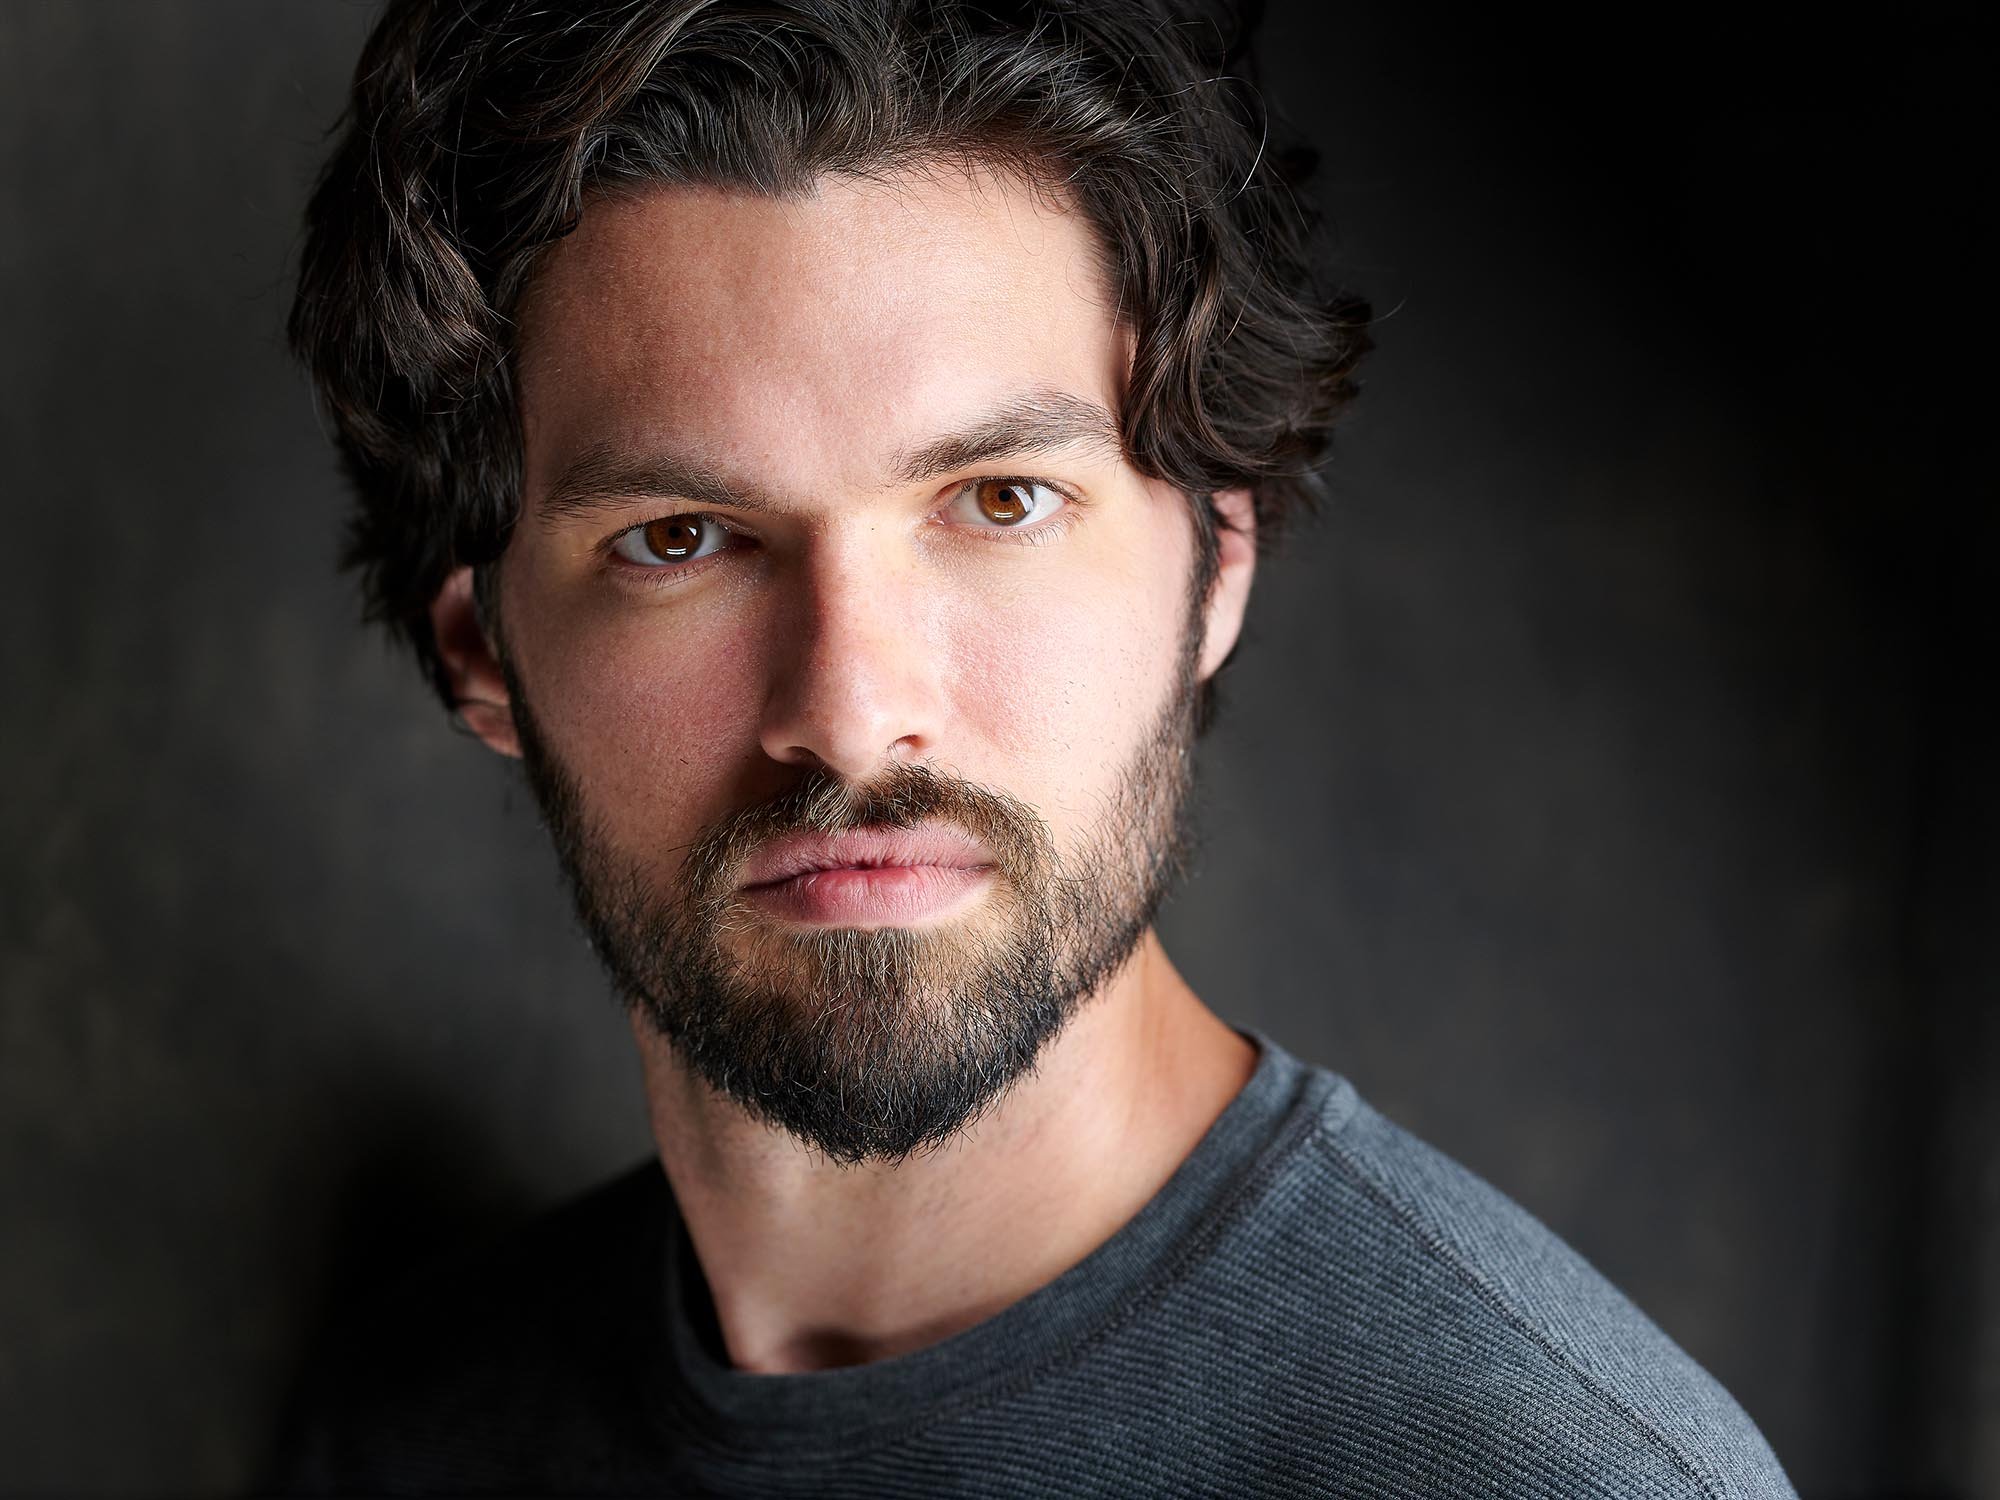
Hard Light vs. Soft Light in Photography: Understanding the Difference and When to Use Each
Want to master the fundamentals of soft lighting versus hard lighting and unsure of where to start? Check out my article on the hard lighting and soft lighting in photography and help get a better of understanding of these two very different, and yet important, lighting disciplines.

You may have heard (correctly) that lighting is the backbone / linchpin of photography. It’s renders your subject, sets the mood nearly in its entirety, and can take an ordinary shot and transform it into an engaging and compelling visual story. One of the most critical decisions a photographer can make when lighting a subject is choosing between soft light and hard light. These two types of lighting can and will dramatically impact ones final image, and understanding their inherent differences is key in mastering the photography craft.
In this comprehensive guide, we’ll break down what hard and soft light fundamentally are, where they differ from one another, how and when to use them, and different use cases in portrait, product, and fashion photography.
Table of Contents
What Is Hard Light?
What Is Soft Light?
Hard Light vs. Soft Light: Key Differences
How to Create Hard Light
How to Create Soft Light
When to Use Hard Light in Photography
When to Use Soft Light in Photography
Examples of Hard and Soft Light in Popular Photography Genres
Tips for Controlling Light Quality on Set
Final Thoughts: Choosing the Right Light for Your Vision
What Is Hard Light?

Hard light is used to describe a type of light that is a direct and focused form of it that creates crisply defined shadows and stronger and more clearly pronounced contrasts between light and dark areas. An emphasis on texture and detail is created with this type of light and it typically comes from a small or distant light source - such as the sun or an undiffused flash.
Characteristics of Hard Light:
Sculpted and well-defined shadows
Much higher contrast and an inherent sense of drama
Edges, pores, and fine details are emphasized through the use of hard light
Heightens the sense of intensity
Fashion editorials, dramatic portraits, and cinematic scenes are all good examples of where hard light often times will be used the most - lending intensity and boldness to an image.
What Is Soft Light?

Soft light is a large and diffused light source that envelopes and wraps gently around the subject - this minimizes shadow and reduces contrast. While typically soft light almost always universally comes from a large light source, keep in mind that it is also relative to the distance of the subject. A relatively small light source can technically be a large light source if placed close enough, while a relatively large light source can be small if placed far enough away.
Characteristics of Soft Light:
Diffuse, feathered, and soft shadows
Low contrast and smoother gradients
Skin appears smoother and more flattering
A natural and gentler mood to the image
A Portrait and headshot photographer, beauty shooters, wedding photographers, and natural light photographers all in general employ soft light because it flatters the subject.
Hard Light vs. Soft Light: Key Differences

The primary or key differences between hard and soft light lie in two areas: the quality and type of shadows produced as well as the texture and detail of what’s being photographed. Hard light creates sculpted, well-defined shadows and punchy contrast; often coming from smaller light sources like a bare flash, midday sun, or modifiers such as zoom reflectors, silver umbrellas, or gridded softboxes. Hard light will oftentimes be found as a mainstay with an event photographer in low-light environments, as they’ll be subject to a speedlight as their sole source of illumination.
In contrast, soft light is gentle and diffused and produces smoother and more feathered shadows that have a more gradual transition between light and dark. Soft light usually comes either larger light sources that have been been diffused via softboxes, umbrellas, or clouds. Imperfections and texture are minimized through the use of soft light and it is used to create natural and flattering portraits in beauty, commercial, and fashion photography. Often times soft lighting will specifically be chosen for use in film photography, as certain film stocks can be married to certain soft lighting techniques to achieve specific nostalgia.
How to Create Hard Light

Creating hard light in photography involves using lighting tools and techniques that produce focused, undiffused illumination. One of the most common ways is by using unmodified flash heads or strobes, which emit a concentrated beam of light that results in sharp shadows and high contrast. Shooting in direct sunlight, especially during midday when the sun is high and harsh, naturally creates hard light due to its small relative size in the sky and lack of diffusion.
You can also enhance this effect using metallic reflectors, which bounce light in a controlled, high-intensity manner, preserving its hardness while adding directional emphasis. For even more precision, gridded modifiers and snoots can be attached to strobes or continuous lights to narrow the beam and create distinct, crisp lighting that isolates subjects and adds dramatic flair. Together, these tools allow photographers to sculpt with light, emphasizing form, texture, and detail.
How to Create Soft Light

Achieving soft lighting in your photography involves techniques that diffuse and spread light evenly. This results in gentle shadows and more flattering, low-contrast looks. Large umbrellas or softboxes, which increase the size of the light source relative to the subject and distribute light more broadly, is one of the most popular and effective practices for doing this.
An additional and alternative technique (and considerably less expensive one) is to bounce light off large, neutral-colored surfaces, such as white walls or ceilings. This turns a small, direct light into a much larger and softer source by reflecting it indirectly onto the subject. Natural window light is also a beautiful and accessible form of soft light, especially on overcast days or when diffused by sheer curtains, providing a wraparound effect that's ideal for portraits and lifestyle imagery. Additionally, using diffusion materials—like scrims, silks, or translucent panels—placed between the light and the subject can help scatter light rays and eliminate harsh shadows. Together, these methods create a soft, natural illumination that flatters skin tones, reduces texture, and enhances the overall mood of an image.
When to Use Hard Light in Photography

Use of hard light in editorial fashion, cinematic portraits, and athletic or fitness photography is most common. Outside of this, it's also extremely effective in black-and-white photography, where tonal contrast and shadow. Enhanced storytelling, particularly when mimicking natural sources like direct sunlight or headlights to suggest tension, mystery, or raw realism is often times common with hard light. While it's less forgiving on skin imperfections, when used deliberately, hard light can create images that are visually striking and emotionally charged.
When to Use Soft Light in Photography

When you want to create images that feel natural, gentle, and emotionally resonant, soft lighting is the way to go. It is the go to for flattering portraits, such as actor headshots or corporate headshots, as the diffused light smooths out skin tones, reduces blemishes, and either minimizes or altogether eliminates harsh shadows.
For adding emotion or romance to a scene, where a warm, subtle glow can be used to enhance intimacy and add a sense of emotional depth to the image, soft lighting is also at the forefront of use cases. Additionally, massive octabanks or other modifiers are constructed to mimic natural light, especially in an indoor setting or while shooting in a window light. This helps to create an organic and true-to-life feel within the image.
Within the world of product photography, soft light is critical for even illumination of your subject. Reducing reflections, highlighting details without overpowering glare, and minimizing texture are all a huge part of the power and characteristic of soft lighting.
Overall, soft light is versatile, forgiving, and found more commonly and across a wider variety of categories and subsets of photography. It is elegant, soft, and atmospheric.
Examples of Hard and Soft Light in Popular Photography Genres

Fashion Photography
Hard Light: High-contrast editorial spreads for publications like Numero or Mission Magazine
Soft Light: Editorial spreads in publications like Harper’s Bazaar and Vogue almost universally
use soft light.
Headshot Photography
Hard Light: Character actors working within a specific niche will seek these out for drama
Soft Light: Actor, corporate, and lifestyle headshots on the whole will use soft lighting
Street Photography
Hard Light: Black and white street photography in urban environments
Soft Light: Overcast days with diffused light can make stock look dreamy and atmospheric
Product Photography
Hard Light: Useful for watches, tech, the dimension that shadows create. Used as well when showing products
In an editorial setting (say a watch at the top of an article for New York magazine).Soft Light: Necessary for food, cosmetics, interiors, or anything with glare
Tips for Controlling Light Quality on Set

Here are practical tips as a summary for lighting points when in studio and making your lighting diagrams.
Control Light Size
Controlling the size of the light source relative to your subject is a foundational practice for on-set lighting. The larger the light source the softer the light - while conversely a smaller light produces a harder effect. Adjusting the physical size of the light or using softboxes or reflectors, you can achieve any desired effect you’d like.
Control Distance
Equally important is controlling the distance between your light and your subject — a closer light is software and more diffuse, while a light further away is harder and punchier.
Lighting Modifiers are Everything
Light modifiers are the most powerful tool a photographer has when in studio. They allow you to refine, sculpt, and shape your light. Diffusion panels, softboxes, umbrellas, and grids can all dramatically change the spread and intensity of the light.
Pay Attention to Shadow Edges
Paying close attention to shadow edges will reveal a great deal of information about the quality of light being cast on your subject. Soft shadows with gradual transitions will come from a soft light source, while distinct, clearly defined edges will come from a hard.
Mix Lighting Styles
Mix lighting styles on set should be something you ultimately should not be afraid to do. The elegant marrying of hard and soft light can add dimension and contrast to an image and is oftentimes a sign that a photographer has truly mastered the application of light. Soft key lighting for instance can make a subject elegant, while hard rim lighting will separate it from everything else in the image. The addition of a soft fill will make that very subject look even more atmospheric and elegant.
Either way, thoughtful control of these factors lets you take creative command of the visual story that ultimately you decide to tell.
Final Thoughts: Choosing the Right Light for Your Vision

There’s no single “right answer” to the question: Which light should I use? Whatever light most fits your vision and taste is ultimately the best option for you. Hard light is stylistic, intrepid, and adds drama; soft light adds atmosphere, is flattering, and used more often than hard lighting. Understanding the difference between between these two lighting qualities allows a photographers to be intentional with his or her work.
Whether creating headshots in a studio or capturing fashion editorials out on location, having a deft understanding and ability to manipulate light is one of the most powerful tools you have as a visual storyteller.
Next time you frame a shot ask yourself exactly what it is you want out of it. Do you want intensity and stylization or do you want elegance and atmosphere.
Your lighting will lead the way.
Have questions? Contact me and I’ll be happy to help answer in any way I can.

Film vs. Digital Photography: Pros and Cons for Modern Photographers

Introduction: Choosing Between Film and Digital Photography
One ongoing and seemingly endless debate that shows no signs of slowing is: film vs. digital photography. Both formats offer a unique set of strengths and a unique set of challenges, and understanding the pros and cons can be critical to helping you decide which best suits your creative and professional needs.
You could be an experienced photographer looking to revisit the bygone days of analog photography, or a beginner or hobbyist photographer simply wondering which format you should ultimately start with, this comprehensive comparison will guide you through key differences in, workflow, image quality, cost, creative control, and more.
1. Image Quality in Film vs. Digital Photography
Film Photography: Classic Tone Recreation and A Timeless Visual Texture
Film’s visual style is distinctive, to say the least. Being especially revered for a natural highlight roll-off that comes from the photographic development process (dealing with emulsion sensitivity ), it’s visual characteristics also include hyper-smooth grain and warm, nostalgic color rendering. Medium and large format film stocks as well provide extremely wide dynamic range values and detail.
Instagram, one of the most well known brands and online platforms in existence and one with a paltry $70.4 billion valuation, was launched initially as a tool that allowed people to take digital images from their phones, run them through a filter, and make them look like analog photographs.
Advantages of Film Photography Image Quality:
Highlight retention is unparalleled
The soft, cinematic grain and organic feel of analog is almost universally mood-evoking
The natural skin tones and color depth of film are automatic and do not rely on the digital calculations of a dslr/mirrorless
Different film stocks come with different visual personalities, moods, and character.
Disadvantages:
Low-light performance was surpassed ages ago by digital, and analog will never come close
You cannot see a preview of the image
Development and scanning can act as a bottleneck if done cheaply / improperly.
Digital Photography: Clarity, Resolution, and Control

Modern dSLR
Modern digital cameras — moreover full-frame and medium format (I own a GFX 100S and, as a new york headshot photographer will personally attest to this ) — offer outstanding sharpness, extremely high color rendition and tonal value, and a very wide latitude when editing RAW files.
Advantages of Digital Image Quality:
High resolution and sharp detail
Performance in low-light conditions that analog cannot come close to matching
On the fly white balance and exposure adjustment
Non-destructive editing techniques allow for more flexibility in the post-production process
Disadvantages:
Harsh highlight clipping. Whereas highlights can roll-off or taper with film, in digital, once it’s clipped it’s gone.
Processing or editing is an art and as such, quality labs are more limited in number.
It is oftentimes said that digital will never contain the soul that film has
2. Workflow Speed and Efficiency

Workflow
Film Photography: A Deliberate Process
Requiring more time and thought, film photography can force one to slow down, think about their settings and composition, and approach their images with more intentionality than digital (though digital photographers can just as well develop a process that places just as much of this in their own work).
Pros of Film Workflow:
Promotes a thought to ones composition
A lack of image review or preview can place more value on each and every frame
A higher emphasis on execution and pre-planning
Cons:
A limited amount of exposures per roll
While turn-around with digital can be instant, film can take days/weeks.
Risk of mistakes without immediate feedback is 100x what digital is.
Digital Photography: Fast and Flexible

Digital cameras allow you to adjust and review hundreds of images instantly. The ability to do this is ideal within the confines of fashion and commercial work. As well, as a full-time event photographer in New York City, I can attest that digital is universally the way to go in this realm.
Pros of having a digital workflow
Image review is immediate and using a histogram can tell you where you exposure is at
Lightning fast post-production and editing allows for instant delivery
While a roll of film may allow for 36 exposures, a 128GB sd card can hold thousands of RAW files.
Cons:
People have a tendency to overshoot in digital.
An “I’ll just photoshop this error” mentality can oftentimes hinder learning and development.
Can require expensive digital backup systems for photographers that shoot a lot.
3. Cost Comparison: Film vs. Digital Photography
Film Photography: High Long-Term Costs

Film cameras themselves may be far more affordable than they used to be, but film stock, development-and-lab processing costs, as well as scanning add recurring expenses that never dissipate. Each roll can cost $15–$30 with processing included. This means that every 36 exposures you’re going to be spending about $25-$50. To put this into perspective, you can at the moment buy a 128gb Sandisk Extreme Pro off of amazon for $20. If I were to use this memory card in my nikon d850, I’d get approximately 600+ images or so. If I were to shoot that same number of images on film, the roll and processing costs would be around $850.
$850 vs $20 is a rather large divider of cost.
Pros of Film Cost:
Film cameras are almost all vintage now - meaning they are exceedingly more affordable than they
used to be.Film photography provides an intentionality of shooting that digital does not. This may end up saving you
in the long-run.
Cons:
Far more expensive than digital, limiting the amount of shooting beginner and hobbyist photographers can do.
Darkrooms and labs are not all created equally. A bad lab can easily ruin your image and good ones are
not available 24/7.As most film cameras are vintage and no longer made, repair and part sourcing is much harder.
Digital Photography: High Upfront Cost Requirement, Much Lower Ongoing Costs Over Time

Digital cameras and lenses are a much newer technology that’s gettingg iterated over every year. This makes digital cameras and lenses considerably more expensive. However, there is no cost-per-shot factor and this makes digital ideal for high-volume shooters.
Pros of Digital Cost:
Costs per image is essentially $0.
Professionals photographers and content creators that use digital are far in the majority
Analog is unforgiving, whereas digital promotes learning on an ongoing basis.
Cons:
Gear depreciates much more quickly than analog. While an analog camera can last 30+ years and beyond, digital can oftentimes only last a few.
Digital photography is extremely popular and companies upgrade their tech every year. This means that staying current can be costly.
The investment for pro-level gear can be quite high.
4. Creative Control and Flexibility

Film: Built-in Character and Constraints

An endless boon of film is that different film stocks yield drastically different looks (instagram’s filters are essentially based around the idea of using different films for your image). Photography aspects like ISO and color profiling are committed to before the first image has even been taken - and that’s by selecting one’s film stock. This leads to a more disciplined creative process.
Creative Advantages of Film:
Each film stock has a unique visual profile and aesthetics (Kodak Portra, Fuji Pro 400H, etc.)
There is considerably less editing to achieve a stylized look
Working within a set of constraints fosters more discipline in creativity
Drawbacks:
Ones ability to correct mistakes is 1000x harder than digital
Manipulating or compositing images is considerably harder
While digital tools for retouching and editing are in the hundreds (now that AI is here, in the thousands)
there are only a small handful for analog / film photography.
Digital: Post-Production Powerhouse

Your options in post production are nearly limitless with digital. Exposure, contrast, highlights, shadows, sharpness, and grain are just a few of the characteristics of the image you can modify (and quite heavily, assuming you’re working in RAW). And outside of what you can do yourself, there are literally tens of thousands of presets and color profiles on the internet that you can use to emulate film and various film stocks.
Creative Advantages of Digital:
Creative freedom in post-processing is nearly limitless
Commercial retouching for things like corporate headshots and visual effects are almost universally digital
Adapts easily to trends and different looks
Drawbacks:
Over editing ones images, especially early on in their career, is quite common
Sometimes having too many choices in the editing room can oftentimes cause “choice-paralysis,”
or the inability to make a decision.Authenticity seems less via digital
5. Archiving and File Longevity
Film Photography: Physical and Archival

When stored correctly, negatives, transparencies, and prints can oftentimes last decades. The data loss and digital corruption that digital photographers are accustomed to are not found in film photography, and archiving in analog is considerably easier and less expensive.
Pros of Film Archiving:
Physical records are permanent, whereas an image on a hard drive is subject to the hard-drive’s lifespan
Can be scanned over and over as technology improves
Software, firmware, and technology changes are something that physical prints are immune to
Cons:
Fire, moisture, and physical damage are all things that physical prints are vulnerable to.
Large collections can take up vast amounts of space
Unless scanned or in a gallery / exhibit, sharing ones work can be limited
Digital Photography: Convenient but Risk-Prone

Storing, copying, and sharing digital files is relatively easy. This being said, they remain vulnerable to hard drive failure, data loss, and even format obsolescence (a raw file thats 20+ years old may have a hard time being read by current software).
Pros of Digital Storage:
Backing up and duplicating digital files is incredibly easy
You can store them on-site, in the cloud, or both
Finding images within an archive is easier due to metadata
Cons:
Avoiding data loss can require putting certain processes in place that accounts for things like multiple backups/etc
Specialized software (adobe lightroom or capture one pro) is required to read RAW files
Accidental deletion or file corruption remains an issue
6. Learning Curve and Skill Building

Film Teaches Fundamentals
Learning manual settings like metering, composition, and exposure are something that’s forced upon photographers though the use of film / analog. Building a solid foundation through the use of film photography is much more critical than through digital.
Benefits of Learning Photography with Film:
Understanding things like lighting techniques and exposure are forced
Teaches that each individual frame is valuable
Basics are taught early on in a way that digital are not
Challenges:
Mistakes during the learning process can be costly
The feedback loop is much slower and can be days / weeks
No metadata for archiving
Digital Accelerates Learning

Rapid trial and error one of digitals main strengths for beginners. With things like histograms and immediate image review, learning every shot in real time is a massive benefit for photographers.
The benefits for Beginners learning Digital:
Instant feedback means a lightning fast learning curve. This can be beneficial for photographers doing fashion test shoots, for example.
Correcting mistakes and ease of experimentation are paramount
Software tools, educational materials, and schooling resources are abundant
Challenges:
Automation can become a crutch
There is less discipline in shooting manual
Oftentimes photographers can go years without learning the foundational skills of the craft
7. Cultural Relevance and Artistic Impact

Film: A Creative Revival
Film photography is undergoing a resurgence in interest like no other, and artists and other younger generations are adopting it more and more for it’s nostalgic value and hands-on characteristics.
Cultural and Creative Pros of Film / Analog Photography:
Creative communities and analog cultures are far more tight knit than digital
Fosters thought in image making
A welcome counterpoint to the perfection that digital achieves
Cultural Cons:
Photographers that only shoot film can be seen as using it as a crutch
It eliminates the photographer from a large number of jobs, particularly ones with fast turnaround
Costs continue to rise for processing and development
Digital: The Backbone of Modern Photography

Digital is the dominant format and this will never change with photography (we achieved the singularity long ago). Brand marketing, photojournalism, and ecommerce are now the realm of digital photography.
Cultural Pros of Digital Photography:
Accessibility and ubiquity
AI tools, social, and creative are in limitless supply
More latitude for innovation and experimentation
Cultural Cons:
Digital fosters content fatigue
Our culture has a shorter attention span for images as they’re being bombarded with them
The line between photographers, influencers, and hobbyists is now less distinct.
Conclusion: Film or Digital Photography — Which One Is Right for You?
Making a choice between film and digital photography depends on your budget, goals, and where your artistic priorities lay. Both formats offer the user the ability to be professional dedicated and to have valuable experiences in the medium:
Film photography should be considered if you value hands-on craftsmanship, waxing nostalgia, and a slower, more thoughtful creative process.
Digital photography should be considered for flexibility, total creative control for commercial or high-volume work, its forgiving attitude when it comes to error, and of course it’s speed.
Many professional photographers now use both mediums for different projects and as a hybridized workflow. Ultimately, however, whatever most readily supports your vision is the best choice.

10 Hobbyist Photographer Tips to Live By
Modeling Headshot - Joe Jenkins Photography
Contents
Learning the Basics
Gear is both necessary and not
Organizing and Cataloguing your Photos
Rights and Consent
Legal and Ethical Lines
Retouching and Editing
Inspiration is not Comparison
Sharing your Work
Developing a Style that is You
Staying Passionate
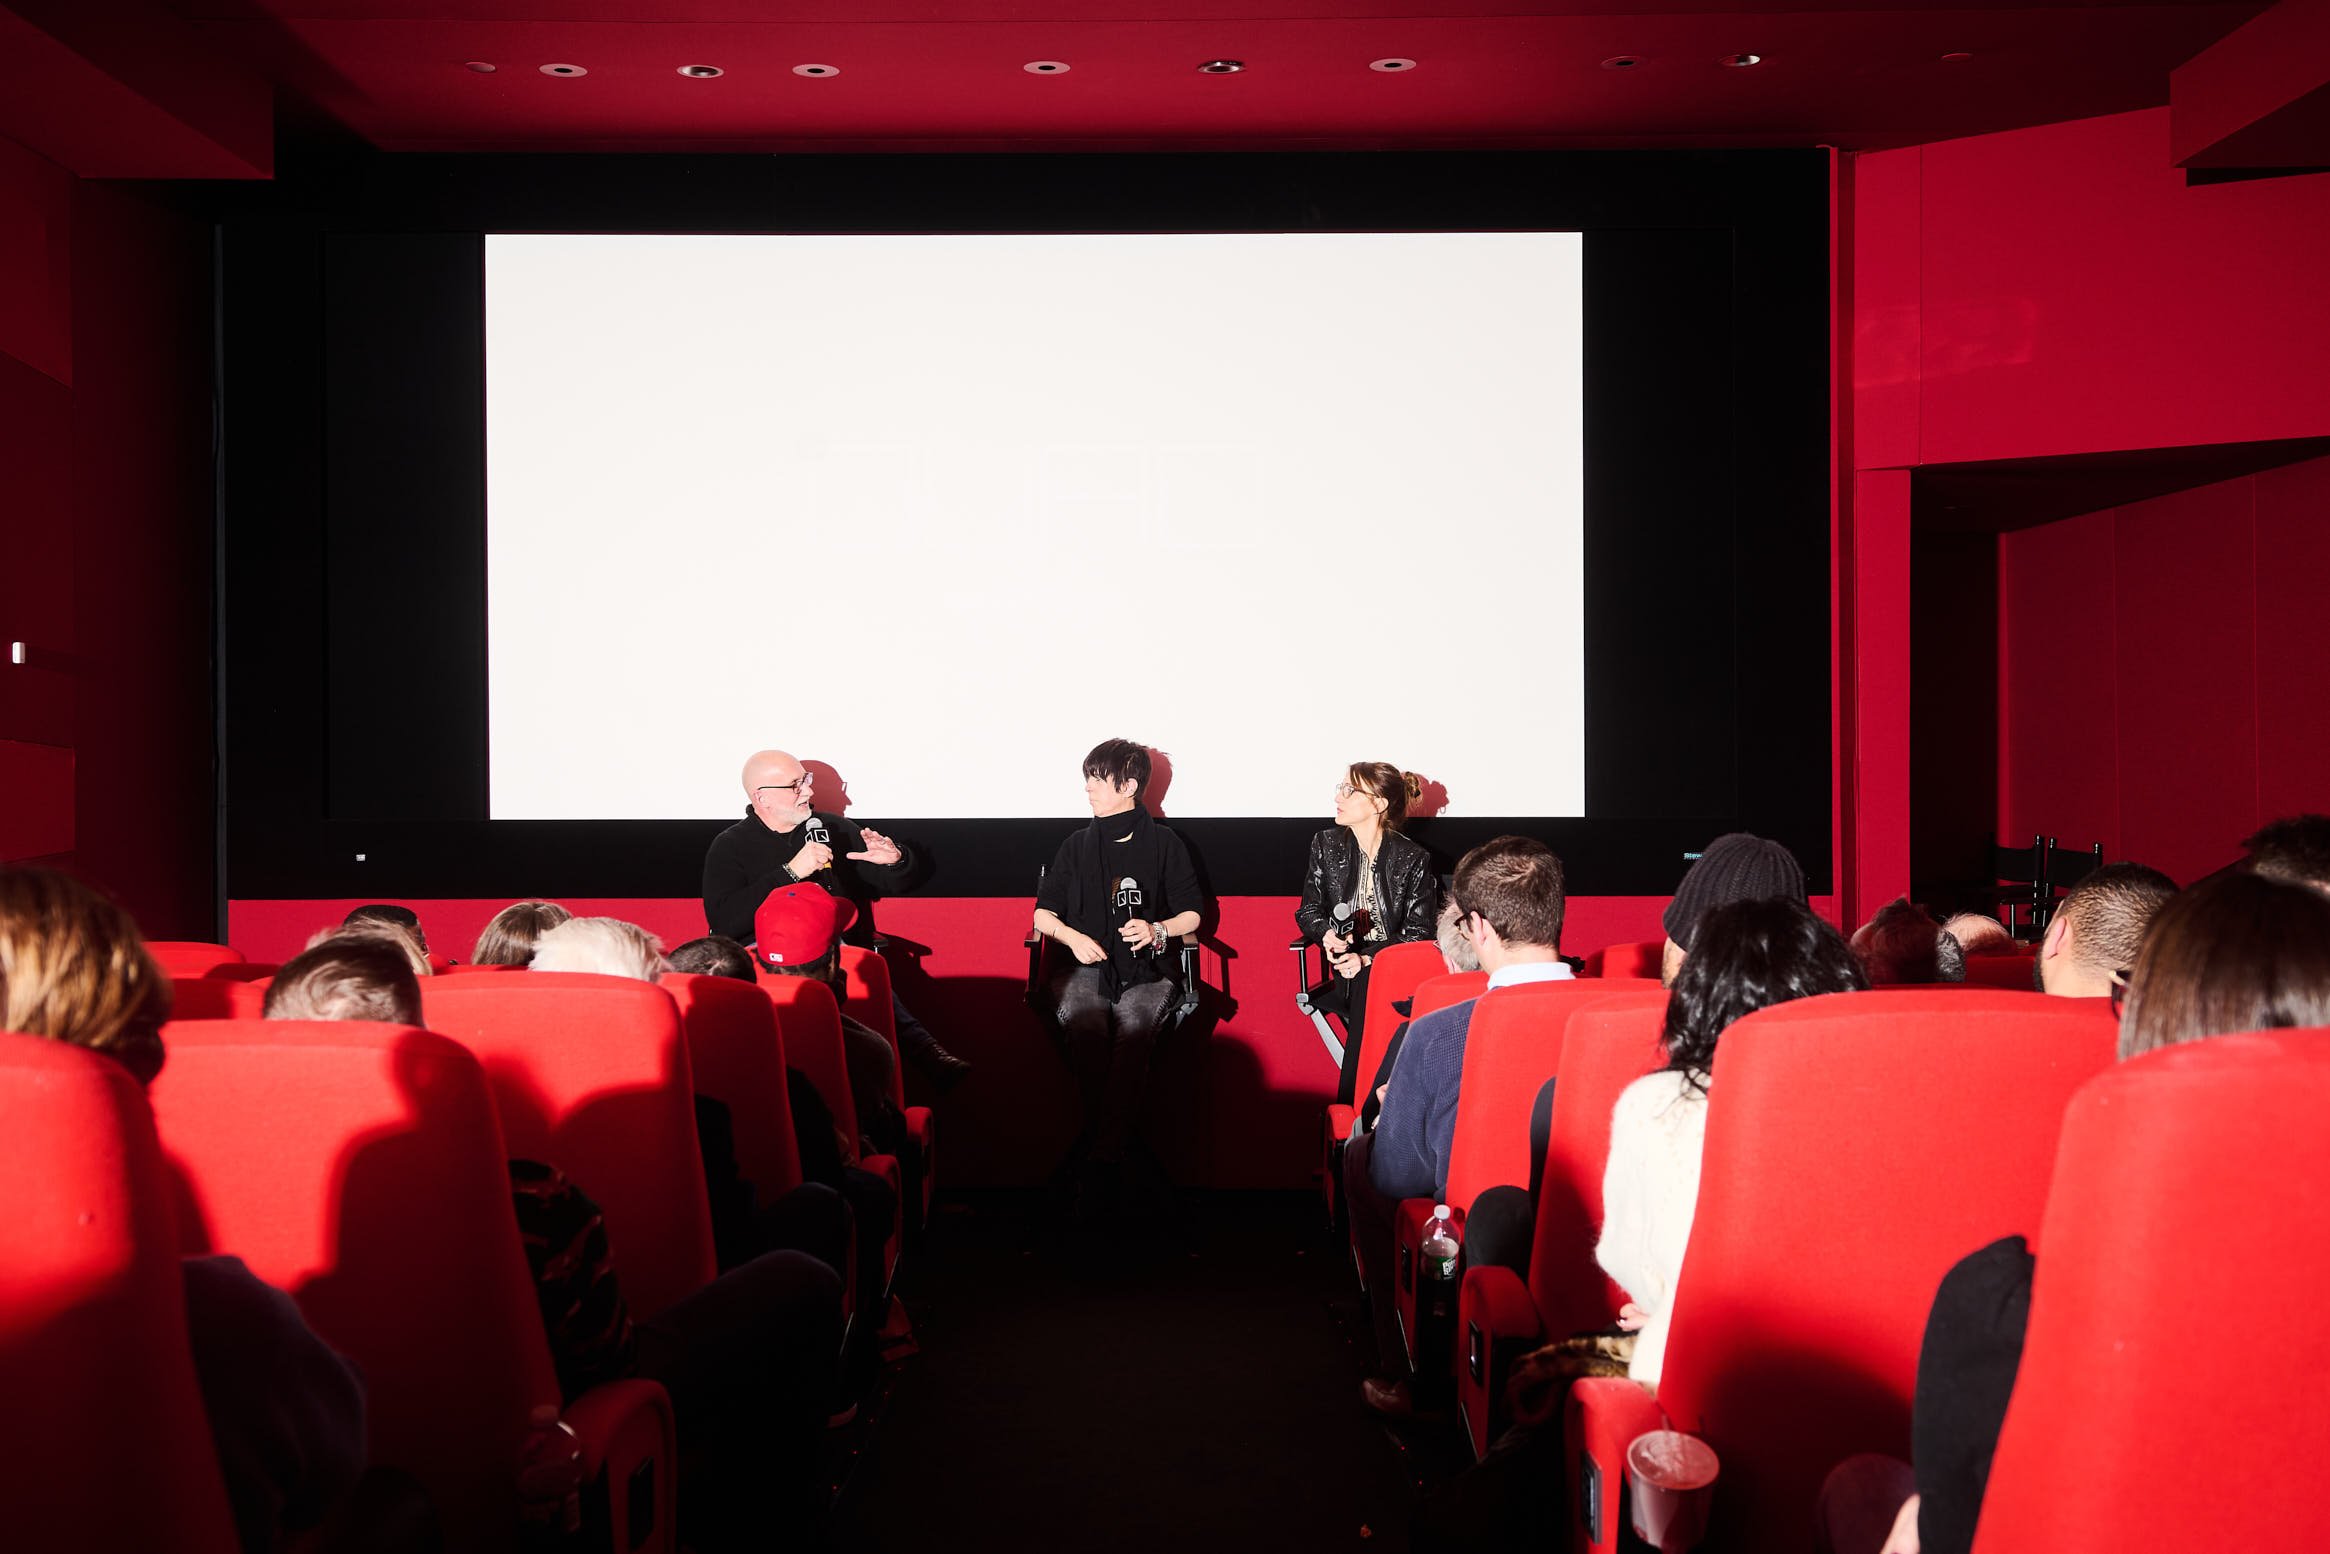
Super Producer DIanne Warren at The Quad NYC for 42 West - Joe Jenkins Photography
1. Learning the Basics
Exposure Triangle
The exposure triangle can seem a bit more like the bermuda triangle at times - and it can oftentimes take a very, very long time to learn . This being said, I almost exclusively shoot on manual mode anymore and, while I’m sometimes (often) a little off on the first shot, after one adjustment or so I can usually have myself dialed in to the correct exposure (ISO, aperture, shutter speed): Understanding this helps take better control of your shots.
As a refresher, below is a summary of the three components of the exposure triangle and their respective definitions:
ISO: ISO, or film speed, can be thought of as your sensor or film’s sensitivity to light. A film speed of 800 or a sensor set to 800 means that it’s much more sensitive to light and thus requires less of it to create an image.
Aperture: Aperture is the size of the opening in your lens (every lens comes with what looks like an iris and is a series of curved blades that all form a central opening. The opening can be adjusted in size and that size determines how much light is let in and also the amount of depth of field.
Shutter Speed: Shutter speed is probably the easiest to understand as it very literally deals with how long the shutter is open and the film is exposed to light. The faster the shutter speed, the less time it is open.Composition: Rule of thirds, leading lines, symmetry, etc.
Light: Learn to see and use natural and artificial light.
2. Gear is both necessary and….not
Many hobbyists fall into the trap of thinking that more gear equals better photos and that is not at all the case; or at least usually. I remember first getting into photography and buying all these items that I very literally used once and then forgot about (looking at you, rogue flashbender).
The thing about photography and gear is that the photographers skill level rises proportionately to the amount / sophistication of gear. And what I mean by that is, the more a photographer works, the more he or she advances. The more he or she advances, the more expertise he or she will have. It’s a bit like racecar driving. The more a racecar driver wins, the more he or she upgrades his car. And the more he or she upgrades his car, the more he or she wins. Gear is an indicator of a level of experience, but not necessarily a conduit to getting it.
Actor Headshot
3. Organizing and Cataloguing your Photos
One shoot can yield hundreds of images, and hundreds of images can quickly turn into a terabyte of data. The first thing you need to determine as a hobbyist photographer is - are you going to keep all of your raws? Personally, I don’t. In twelve years as a professional photographer I’ve never once needed to go back to a RAW file for a client that was any longer than a few weeks in the past. Seriously - what do you need them for if the shoot itself is of no great consequence to yourself.
I personally feel like we need to get out of the mindset that every RAW file absolutely be kept on record because it’s expensive to do so. In any one given year I could shoot a few hundred thousand images and storing those requires space - lots of it.
This being said, I do keep the JPGs and have worked out a relatively standard convention for storing them. Each top level folder is the name of the shoot and contained within that folder is another folder named ‘selects.’ Within selects resides edits and retouches, depending on the shoot type (event photography or headshots, for instance).
For cataloguing images, Lightroom is in my opinion the best software platform for keeping everything organized.
4. Rights and Consent

Wedding Photo at Sunset - Joe Jenkins Photography
Privacy and consent in photography, in an age where sharing online is instant and widespread, are important topics. Whether you're a hobbyist or pro, understanding when and how to get consent both insulates you legally and allows you trust with your subjects.
Here’s a breakdown of what you should know:
When consent isn’t neededGuidelines may differ by country:
Public Places: You generally don’t need permission to photograph in public places. In the event you find yourself on private property that feels public (say, a work campus), that campus may very well own the sidewalks and ask you to keep off of them. You can then step onto the road (which they likely don’t own) and suddenly you’re gold.
As well, if what you’re photoraphing is of public interest, (protests, parades), you can typically photograph freely.
When you absolutely need consentYou should get permission in the below:
The subject is in a private place (home, etc) and their is an expectation of privacy
The subject is under 18 and a minor
You plan on using the image commercially
5. Legal Stuff and Ethical Lines

Editorial Portrait - Joe Jenkins Photography
You should take time to understand both the legal and ethical guidelines surrounding photography — and this is true whether you're a professional or even a hobbyist. Just because a photo can be taken doesn’t necessarily mean it should be taken (I’d imagine celebrities would heartily endorse this statement).
What’s considered generally okay and legalPublic Spaces: Public areas are free-game for whatever’s visible (this doesn’t necessarily apply to the people in those places, especially those that are under 18).
Architecture & Landmarks: Architecture and Landmarks is okay, though commercial usage may be limited in certain situations.
Public People: There’s generally not a huge expectation of privacy when in a public place. This isn’t to say you should get right in someone’s face and take a photo of them of course. As well, irrespective of whether the person is in public or private, you absolutely need their consent to use their image commercially.
What is VerbotenTrespassing: This seems like a given, but don’t go fence-hopping to get a photo. There’s a reason why that fence is there in the first place, and you may find that the police don’t really care about the great angle you were trying to get.
Hidden Cameras: Photography that invades personal privacy (hidden in clothing, furniture, etc) is very much a hard no.
Children: Taking photos of a child without parental consent is a major no.
Misuse of Likeness: Once again, you cannot use an image of someone commercially without their consent.
Drones: Drones are really cool, and also prohibited pretty much everywhere. You cannot fly over peoples homes. You cannot fly them in urban areas and over sidewalks. You really can mostly only use drones on your own private property and as well designated public spaces.
6. Editing and Retouching
Less is more is a phrase that has never been more applicable than in retouching. Honestly, at the end of the day it mostly has to do with how trained your eye is and where you are personally at with your work. If this is your second day as a photographer and retoucher, no matter what you do, your image is only going to be as good as your eye is at determining how much, or how little, retouching / editing is necessary.
As a comparison, take a look at newspaper comic strips and if you have a moment, take a look at ones in their early days versus ones in their later years. Garfield, for instance, is a really good example. Garfield in his early years looks almost nothing like he does after a decade of being drawn by the comic’s author, Jon Davis. In the first year or so of Garfield the comic strip, it’s titular main character, Garfield, looked a bit more like a giant orange triangle with whiskers than it did a cat. As the years went by and Jon Davis got better at illustrating, he slowly but surely began to take on and develop the form we’re all accustomed to now.
The same can be said about your retouching and editing - in the beginning it’s going to look inevitably a little early-stage because no matter what you do your eye and your level of experience simply aren’t at a point where you’ll be able to produce experienced work. This being said, you nevertheless should try to keep things on the minimal side. When editing, try taking breaks and coming back to your work after a period of time and giving yourself a fresh perspective. Oftentimes in doing so you’ll be better able to get a better idea if things are over-edited.
7. Inspiration is not Comparison
Engagement Party - Joe Jenkins Photography
I’ve been a professional photographer now in New York City for twelve years. I’ve shot Martin Scorsese, work for the best modeling agencies in the world, and still get depressed out of my mind if I allow myself to get in my head and compare my work to others. Comparing your work to that of others is pointless and a waste of both time and energy and as well can actively work to sabotage you and hold you back.
Now, using others’ work as a source of inspiration is another matter entirely and that is something I routinely do.
Seriously, though, you do you and no one else.
8. Sharing your Work
When you start sharing online, you should be prepared for low engagement - and you shouldn’t let that discourage you.
Keep in mind that when you ask for people to critique your images online, the people that do so may be at a lower skill level than you.
- Humans have a habit of seeing things written down and taking them as creed and as well assuming that the people that authored them
must be authorities (or why would they have written them). Keep in mind that when you go into a place like reddit, or a photography group
on facebook, and ask for people to critique your work, the people doing so are more than likely in the exact same place as you. Take
online critiques with a grain of salt and nothing more.Be aware that uploading to certain platforms opens your images up to free use.
Uploading an image to flickr, for instance, may place some of your images under creative commons license - meaning that once it’s uploaded, anyone can download it and thereafter use it. Which sometimes is not the coolest thing in the world.
9. Developing a Style that is You
The ability to produce a photograph and it instantly be recognized is the pinnacle of what a photographer hopes to achieve through his / her craft. The greatest photographers in history, from Peter Lindbergh, to Annie Leibovitz, to Steven Meisel - all of them create images and with their portrait lighting in such a way that when one looks at their work they can almost, without hesitation, ascribe that work to that individual.
This being said, in keeping with the above point that one shouldn’t compare their work to others - a photographer should strive to develop an individual style and an aesthetic that is singular to them. How one goes about doing that is up to the individual, but the best way to do so is to keep shooting and as much as possible and to keep allowing yourself to be influenced by the works of others (this could come from photographers or simply other museum visits).
Actor Headshot - Joe Jenkins Photography
10. Staying Passionate
Photography shouldn’t be a chore. Shoot what excites you and if it does not, don’t - don’t try to force a square peg in a round hole. if you were meant to be a portrait photographer then you’ll enjoy taking portraits. If you were not meant to be a portrait photographer - you won’t.
Try joining online groups, take photography challenges, take walks with your camera, and do things that are off the beaten path. Even something so simple as shooting your running faucet with a speedlight (which I’ve done in the past, and yielded something quite cool), can produce inspiring imagery.
Conclusion
Photography is hard work and requires time, patience, and dedication (to get good at, anyhow). Being a hobbyist can be a daunting task, as there are more photographers in the world than there have ever been at any point in history. Gear, criticism, social media engagement (or disengagement), and the like can all weigh heavily on the aspiring snapper.
This being said, taking the above into account is a good way to guide yourself into the craft and ultimately pursue something that is extremely fulfilling.
Featured in Dreamwave's top ten NYC Headshot Photographers
Recently was featured in an article by headshot startup Dreamwave as one of New York City’s top ten headshot photographers. You can go ahead and check it out here.

A Q&A with Martin Scorsese
A client reached out in late December ‘24 needing event photography for a Q&A. The Q&A they were having was with a distinguished guest and, having shot dozens of Q&A’s with distinguished guests, I didn’t think too much about it. I quoted the client a price (which was around 60% lower than my usual fee, as it was a religious organization) and went about my day.
Roughly two days prior to the event they sent me an email saying that ‘Mr Scorsese…..(insert details here).
My brain froze and I was stunlocked for a few moments while I tried to comprehend what that email had just said. Martin Scorsese was the distinguished guest? No way. Can’t be.
I asked if by Mr Scorsese they meant Martin Scorsese and they said ‘Yes, Martin Scorsese.’
And so, Mr Scorsese being my favorite filmmaker of all time and someone beyond legendary, I freaked out. I emailed the client asking if I could get a portrait of Mr Scorsese and wasn’t able to get much of a yes or no on the matter. The night of the shoot, even then after his publicist showed up I still had no idea if I was going to be allowed to get the portrait.
Finally, with all my lighting set up (I brought about 3 bags worth and wasn’t sure if I was even going to be able to use it), as a last ditch effort I pulled up the work that I kept on my phone. His publicist looked at the work, then looked at me, then looked at the work, and issued a string of words that I will, for the rest of my life, never forget.
“Ok, you can shoot Marty.”
The shoot happened on January 3rd, my birthday. And at Old St Patricks cathedral (my middle name is Patrick). One of the greatest days of my life - no exaggeration here.
Shoot: A Q&A with Martin Scorsese
Date: 1/3/2025
Venue: Old St Patricks Cathedral
Category: Corporate Event Photography


3 Great Headshot Examples,What Defines Them, and What Type You Need
Corporate Headshot with commercial styling
Headshot photographers are plentiful. You know how when you run a search on google for something, by the fifth page the results have started to meander a bit and no longer are directly related to the thing you are searching for?
Example:
You run a search for peanut butter jar manufacturers (because you wanna take on big peanut butter, good on you). As there are only so many peanut butter jar manufacturers in the world, by the fifth page, google has run out of companies in the world that manufacture peanut butter jars. And so, not to be embarrassed that they can no longer give you peanut butter jar manufacturers, they start throwing in things that are related to peanut butter jar manufacturers, and by the tenth page of results you’re reading about peanut shaped balloon animals.
This is not the case with headshots in a local market. Even twenty pages back, that direct search is still going strong. Entry 139 is Jim the Headshot Photographer and entry 140 is Jim The Headshot Photographer’s mom - the amount is dizzying.
And so, with this said, how do you make a decision as to who to choose and what type of shot you need and who exactly you need it from? Where do you look for images that work? What examples constitute great headshots and what do not?
The below headshot examples cover the fundamental categories of headshot photography and can help you out as an introduction on what to look for in a session and what sort of images to choose for your career.
Table of Contents
Key Takeaways
Example # - Dramatic
Example #2 - Commercial
Example #3 - Corporate / Professional
Conclusion
Key Takeaways
You need to decide on whether or not you want in-studio or outdoor shots and the market you’re in is largely responsible for that. Los Angeles, for example, has its headshots mostly taken outdoors. New York City, on the other hand, is responsible for mostly in-studio portraits (I’ve always found this ironic, given that indoor space is much more expensive and less available than Los Angeles).
Are you a commercial or dramatic actor? Commercial images are much airier, friendly, and the subject is smiling 100% of the time. Dramatic, or legit, headshots on the other hand are much moodier, serious, and don’t involve any sort of smile at all. Additionally, lighting setups for a headshot are completely different when going from commercial to dramatic. As different headshot photographers have different strengths, you can at least start at deciding on whether or not a photographer’s style is geared more towards commercial or more towards dramatic when making your decision.
Your best angle is generally straight on.
The headshot needs to look natural and it needs to look authentic to you - regardless of whether it’s studio dramatic/commercial/outdoors. If you’re a serious person, your expression should be serious. If you’re a super friendly and smiley person, your expression should be sort of super smiley and friendly.
A Dramatic headshot is referred to as legit
Darker, more natural colors are better for dramatic headshots as they distract less from the overall mood and tone of the image.
Lighter, airier, and more colorful clothing is better for commercial portraits and headshots, however, and give the image a more upbeat mood.
Example #1 - In Studio Dramatic

In-studio shot with Dramatic lighting
What Is a Dramatic Headshot?
A dramatic actor headshot is a specialized portrait that conveys depth, intensity, emotion, and is designed to highlight an actor's ability to portray serious and impactful roles. These headshots are an actor’s primary tool aimed at landing roles in dramas, thrillers, or other genres that require a serious tone. Unlike commercial headshots that often aim for a bright and approachable feel, dramatic headshots focus on evoking a mood that runs parallel to the story’s seriousness and tone.
Lighting in dramatic or legit headshots tends to involve much more use of shadow and mood than commercially lit images (which involve almost no-shadow) and there is a massive difference between the lighting you will find in an in-studio session and an outdoor session. As the photographer has complete and total control over an in-studio session, the lighting will typically involve more of the below aspects:
Low-Key Lighting: Often used to create shadows and depth, low-key lighting adds contrast and drama to the face.
Directional Lighting: Techniques like short lighting (illuminating the side of the face away from the camera) can enhance the contours of the face, adding a moody, three-dimensional effect.
Modifiers: Softboxes or grids can create controlled highlights while maintaining a dark, cinematic feel.
This being said, in-studio dramatic are in my own local market the most common form of portraits in this list of examples. And going a step further, the vast majority of them are photographed with studio lighting (as opposed to a daylit studio). As far as the expression goes, you generally want a mixture of two things. You want the expression to be neutral and you want the expression to convey authority - that’s mostly it. And most importantly you want the expression to look natural.
Wardrobe choices should support the tone of the headshot. Darker, solid colors such as black, navy, or gray are common, as they emphasize the face and lend a serious undertone. Avoid busy patterns or bright colors that can detract from the mood.
Background
Dramatic headshots typically use darker or neutral backgrounds to keep the focus on the subject. Subtle gradients or textured backdrops can add dimension without overwhelming the image.Framing and Composition
Tight framing around the face and shoulders keeps attention on the subject. Minimalism in composition emphasizes the actor's expression and presence, making every detail of the performance-ready look matter.
The Purpose of Dramatic Headshots
For actors, the purpose of a dramatic headshot is to highlight their ability to portray serious characters and to underscore their range of emotions. It’s that emotional range that allows the actor to express an oftentimes complicated and complex character.
In the corporate world, a dramatic headshot is used to convey authority and expertise - lending the voice behind the headshot credibility and competence.
Modeling is an entirely different world unto itself and split between the terms fashion and commercial. Fashion is more like Vogue, Numero, and Harper’s Bazaar, whereas commercial is more like advertisements seen at larger retail brands. If doing fashion, the headshots are dramatic. If doing commercial, the headshots are light and airy.
Example #2 - In Studio Commercial Headshot
Commercial Actor Headshot
In the world of photography, commercial headshots are the charming, approachable cousins of their moody and intense sibling, the dramatic headshot. They’re bright, friendly, and tailored to convey one message: “You can trust this person.” Whether it be for a business professionals, actors, or marketing materials, a commercial headshot is designed to sell a personality, a brand, or an idea in the most accessible way possible.
But don’t let the simplicity fool you, however. Nailing a commercial headshot takes more than just pointing a camera at someone instructing them to smile. It’s an art form that blends technical skill with an intuitive understanding of the subject’s goals and, most importantly, a friendliness and approachability of the person behind the camera that gets that expression to begin with. Below are the essential ingredients behind a great commercial headshot.
Examples of good commercial images in this arena include:
Lighting: Bright and Flattering
Commercial headshots are all about approachability. Sculpted shadows and high contrast are not generally found within the commercial headshot realm —this is the realm of soft, flattering light that makes your subject look their best without drawing attention to the lighting itself. The entire purpose of a commercial portrait is to sell a person that will be selling a product.
Remember that.
Expression: Confident, Warm, and Friendly
The hallmark of a good commercial headshot is a genuine expression. Think warm smiles, relaxed body language, and eyes that say, “I’m here to help.” Forced grins or overly posed stances can feel fake and alienating—exactly what you’re trying to avoid.
The trick? Talk to your subject. Crack a joke, ask them about their favorite vacation spot, or play their favorite playlist. A natural smile is always more engaging than a staged one.
Wardrobe: Clean and Professional
Stick to solid colors that complement the subject’s features and avoid busy patterns or logos (unless the brand requires it). For professionals, a classic button-down shirt, blazer, or blouse works wonders. Actors might go for something a bit more relaxed, like a fitted t-shirt or a casual sweater, depending on the roles they’re targeting.
Background: Neutral and Non-Distracting
In most cases, commercial headshots use neutral backgrounds—white, gray, or softly blurred natural settings. The goal is to keep the focus squarely on the subject while maintaining a clean, polished look.
Pro Tip: A subtle gradient or slight texture in the background can add depth without pulling attention away from the person.
Example #3 - In-studio Corporate Headshot
Corporate Headshot shot on site at client’s office
What Are Corporate Headshots?
Corporate headshots, synonymous with Linkedin headshots, are polished and professional images designed to exude confidence and authority over one’s given area of business. These portraits are designed to project competence, credibility, and trustworthiness, and they’re anymore as much of a requirement as a resume itself; more so in reference to your digital presence.
This being said, the internet has done a lot for portraiture in general and the day and age of stiff-looking headshots or people in front of blue, sponged backgrounds are (blessedly) over. A well-executed corporate headshot balances professionalism with relatability while at the same time conveying personality and modernity.
Basically, corporate headshots can be cool. And the cooler your corporate headshot, the more valuable your personal brand.
Why Are Corporate Headshots Important?
Corporate headshots are more than just a photo—they’re a branding tool. Whether it’s for an individual professional or an entire team, these images communicate key values like competence, reliability, and professionalism.
Common Uses:
LinkedIn Profiles: A professional headshot increases credibility and helps make a strong first impression.
Company Websites: Consistent team headshots enhance a company’s brand image.
Press and Media: A polished headshot is essential for press releases, interviews, and speaking engagements.
The Evolution of Corporate Headshots
Gone are the days of stiff, lifeless portraits that look like passport photos. Today’s corporate headshots strike a balance between formal and modern, reflecting the evolving workplace culture. They’re designed to show personality without compromising professionalism.
Final Thought: Professional, Not Pretentious
Corporate headshots are about walking the fine line between formal and friendly. When done right, they’re more than just a photo—they’re a professional’s calling card, a company’s image, and a gateway to connection and trust.
Conclusion
Headshots have evolved considerably since the days of analog but are remarkably important. Despite the myriad use cases for headshots, the three above referenced (dramatic, commercial, and corporate) still represent the fundamental three seen most commonly and which all others typically branch out from.

3 of The Most Commonly Used Headshot Lighting Setups


Modeling Headshot
Headshot lighting can be a complicated subject, but it also revolves around three incredibly simple principles and setups. After eleven years of working with it as a headshot photographer in nyc, it excites when it works and confounds when it does not. Nothing is more rewarding than a beautifully lit headshot and nothing is more frustrating than one that looks like garbage.
If you find yourself intimidated by the sheer volume of choices and and decisions that can be made when becoming a photographer, it’s lighting techniques can really be broken down into three simple setups that you can use to carry you, very literally, throughout a career.
Whether you’re just starting out or an industry veteran, this guide can either be an intro or a refresher and break down the mass of noise into a few simple to use and easy to follow techniques that surround 90% of commercial portraiture.
Table of Contents
Key Takeaways
The Big Three - Loop, Butterfly, and Broad
Loop Lighting
Butterfly Lighting
Broad Lighting
Summary
Conclusion
Key Takeaways
There are a dizzying selection of lighting setups and techniques available to photographers with their headshot lighting, but 90% of them can all be broken down and branch out from three simple setups or techniques.
These three techniques are the most widely used and commonly found setups in the industry, and they can carry a professional photographer through every facet of an industry - be it from commercial portraiture, to actor, to beauty, and beyond.
Each lighting technique is more commonly found within a specific industry. Loop lighting, for instance, is used more for actor and journalist portraiture. Butterfly lighting is more commonly found in beauty.
The There Most Common Lighting Techniques are:
Loop Lighting
Butterfly Lighting
Broad Lighting
Broad Lighting is dependent on the subject’s face resting at an angle.
Loop lighting is dependent on the subject’s face being straight-on
Modifiers, sizes of light, or equipment used do not matter in respect to these lighting techniques. A loop light is still a loop light whether the key be a 69” Octabank or a speed light.
What is Loop lighting?
Loop lighting - Modeling Headshot
Loop lighting is not only the most common form of headshot lighting but it’s also the most common form of portraiture lighting in general. Named after the distinctive loop that forms just underneath and to the opposing side of the person’s nose, loop lighting is also referred to as 45 / 45 degree lighting (this stands for pointing down by forty five degrees, and at 45 degrees away from the subject’s forward-pointing angle.
Loop lighting encompasses a massive array of portraiture types most commonly used in beauty, editorial, general purpose portraiture, and corporate headshots.
While earlier cited as 45/45 lighting, one can play a little with the angle exactly and move it either closer to axis or away from axis, depending on taste. A less commonly used gauge for how good your loop is is the far-side of your subject’s face. If the light is too far-off axis, the shadowed side of your subject’s face will begin to creep over and move toward’s the center.
What is Butterfly Lighting?

Corporate Headshot Utilizing Butterfly Lighting Technique
Butterfly lighting is more commonly found in beauty and named for the distinctive butterfly shape that forms underneath the subject’s nose. The placement of the light is directly overhead the subject, pointed down. How high you have the light and how much angle there is pointed down at your subject will determine how flat the lighting is.
In the above example, the light itself is positioned just above the head of the subject (as in if the camera was raised an inch higher, the bottom of the octabox would be in it’s viewfinder).
As mentioned above, the angle of the lighting in relation to the subject will determine how flat the lighting is (or otherwise). If the light is positioned extremely low to the subject and pointed almost parallel to the subject’s face, the lighting will ‘flatten out’ and the subject will not have a lot of volume to the image (or it won’t look as three-dimensional). If, on the other hand, the lighting is raised slightly higher and closer to the subject and angled downward, more volume and dimension will be added to the image.
As with loop lighting, typically the angle the light casts downward is at about 45 degrees. The difference between loop lighting and butterfly lighting is that loop lighting can oftentimes be used for slightly more dramatic effects, while butterfly lighting almost universally has a more commercial and airy feel to it.
Another aspect of butterfly lighting comes from the light that forms on the face. Oftentimes the photographer can assess how correct the lighting placement is in the headshot by the pattern of light that falls on the subject. Notice in the above image the diamond shaped pattern of light in the center of the subject - that is an indication of proper lighting.
What is Broad Lighting?

Actor Headshot
While loop lighting is the key placed at forty five degrees to a subject looking straight at the camera, broad lighting is the key placed at forty five degrees to a subject at an angle. The reason the lighting itself is called broad lighting is because the key light is cast at the broad side of the subject’s face (or the area of the face shown most in the camera).
Broad lighting is used in a variety of circumstances but primarily for actor shots, journalist and editorial portraits, and is almost always used for beauty lighting when the subject is at an angle.
Short lighting, the opposite of broad, is rarely used in commercial beauty.
Summary
Loop Lighting - Placed at forty five degrees to subject and forty five degrees down, this lighting is named after the distinctive loop shadow just under ad to the side of the subject’s nose. Far and away the most commonly used form of lighting. Encompasses nearly all forms of portraiture.
Butterfly Lighting - Placed overhead of the subject and cast generally forty five degrees down, this form of lighting is named after the butterfly shadow cast just under the subject’s nose. Most commonly used in beauty and commercial portraiture.
Broad Lighting - Placed at forty five degrees to an angled subject, or a subject not directly facing the camera, and forty five degrees down, this lighting is once again not named like the above two setups (in that it is not named after the shadow cast by the key light). Broad lighting is called broad lighting because the key light is used to light the broadest, or largest area of the face (the area of the face closest to camera).
Conclusion
You’ve likely heard that lighting is everything in photography - and it is. This being said, whether just starting out or even being an industry veteran, the amount of lighting techniques one can practice with their headshots is beyond dizzying, myriad, and numerous.
However
Just remember that the dozens of hundreds of thousands of portrait and headshot lighting practices almost always spring from the above three principles. Loop, butterfly, and broad - nearly everything springs from those three fundamentals and you can use them in nearly any given situation to carry you through a shoot.

5 Things Every Headshot Photographer Should Know / Do
Corporate Headshot, 2023
Direction
I was once reading an interview of a fairly well known commercial and music video director. He had just completed a video for Jay-Z for the song ‘On To The Next One,’ and the interviewer asked the director what it was like meeting Jay-Z and if it was difficult working with him. The director replied that no, it wasn’t, and the interviewer then asked if Jay-Z, being who he is and the amount of experience that he has, was open to direction (the idea being that someone like Jay-Z would be hard to direct as he’s so much experience that he’d know what to do and want to be responsible for doing it himself).
The director replied that ‘no, Jay-Z was not difficult to direct at all,’ and that one thing he’d learned over the course of his career was that each and every person he’s ever worked with, regardless of how famous they were, all shared one trait - each and every one of them has wanted to take direction. No matter how big they were and what accomplishments they’ve had, each and every person he had ever worked with wanted feedback for being on camera.
When people are in front of a camera, they almost always universally want direction from the person behind it. This being said, the same goes for a set of headshots.
Each and every person you encounter over the course of your career will all share one commonality and one trait - they will all want direction from you. From the actors on their eighty-first headshot session to fresh out of college corporate grads getting their first linked-in shot, each and every one of them will want to be told what to do - and it’s your job to do it.
The most common forms of direction are for people to lean forward and pronounce their jawlines, as the jaw and the eyes are the two most important elements of a headshot, and for advice on situating the eyes. I generally tell people to imagine a squint from 0-100% and then squint 10% of the way - or move their eyes together almost imperceptibly. This tends to make people more expressive and, as well, negate any deer-in-headlights effect you may have going on.
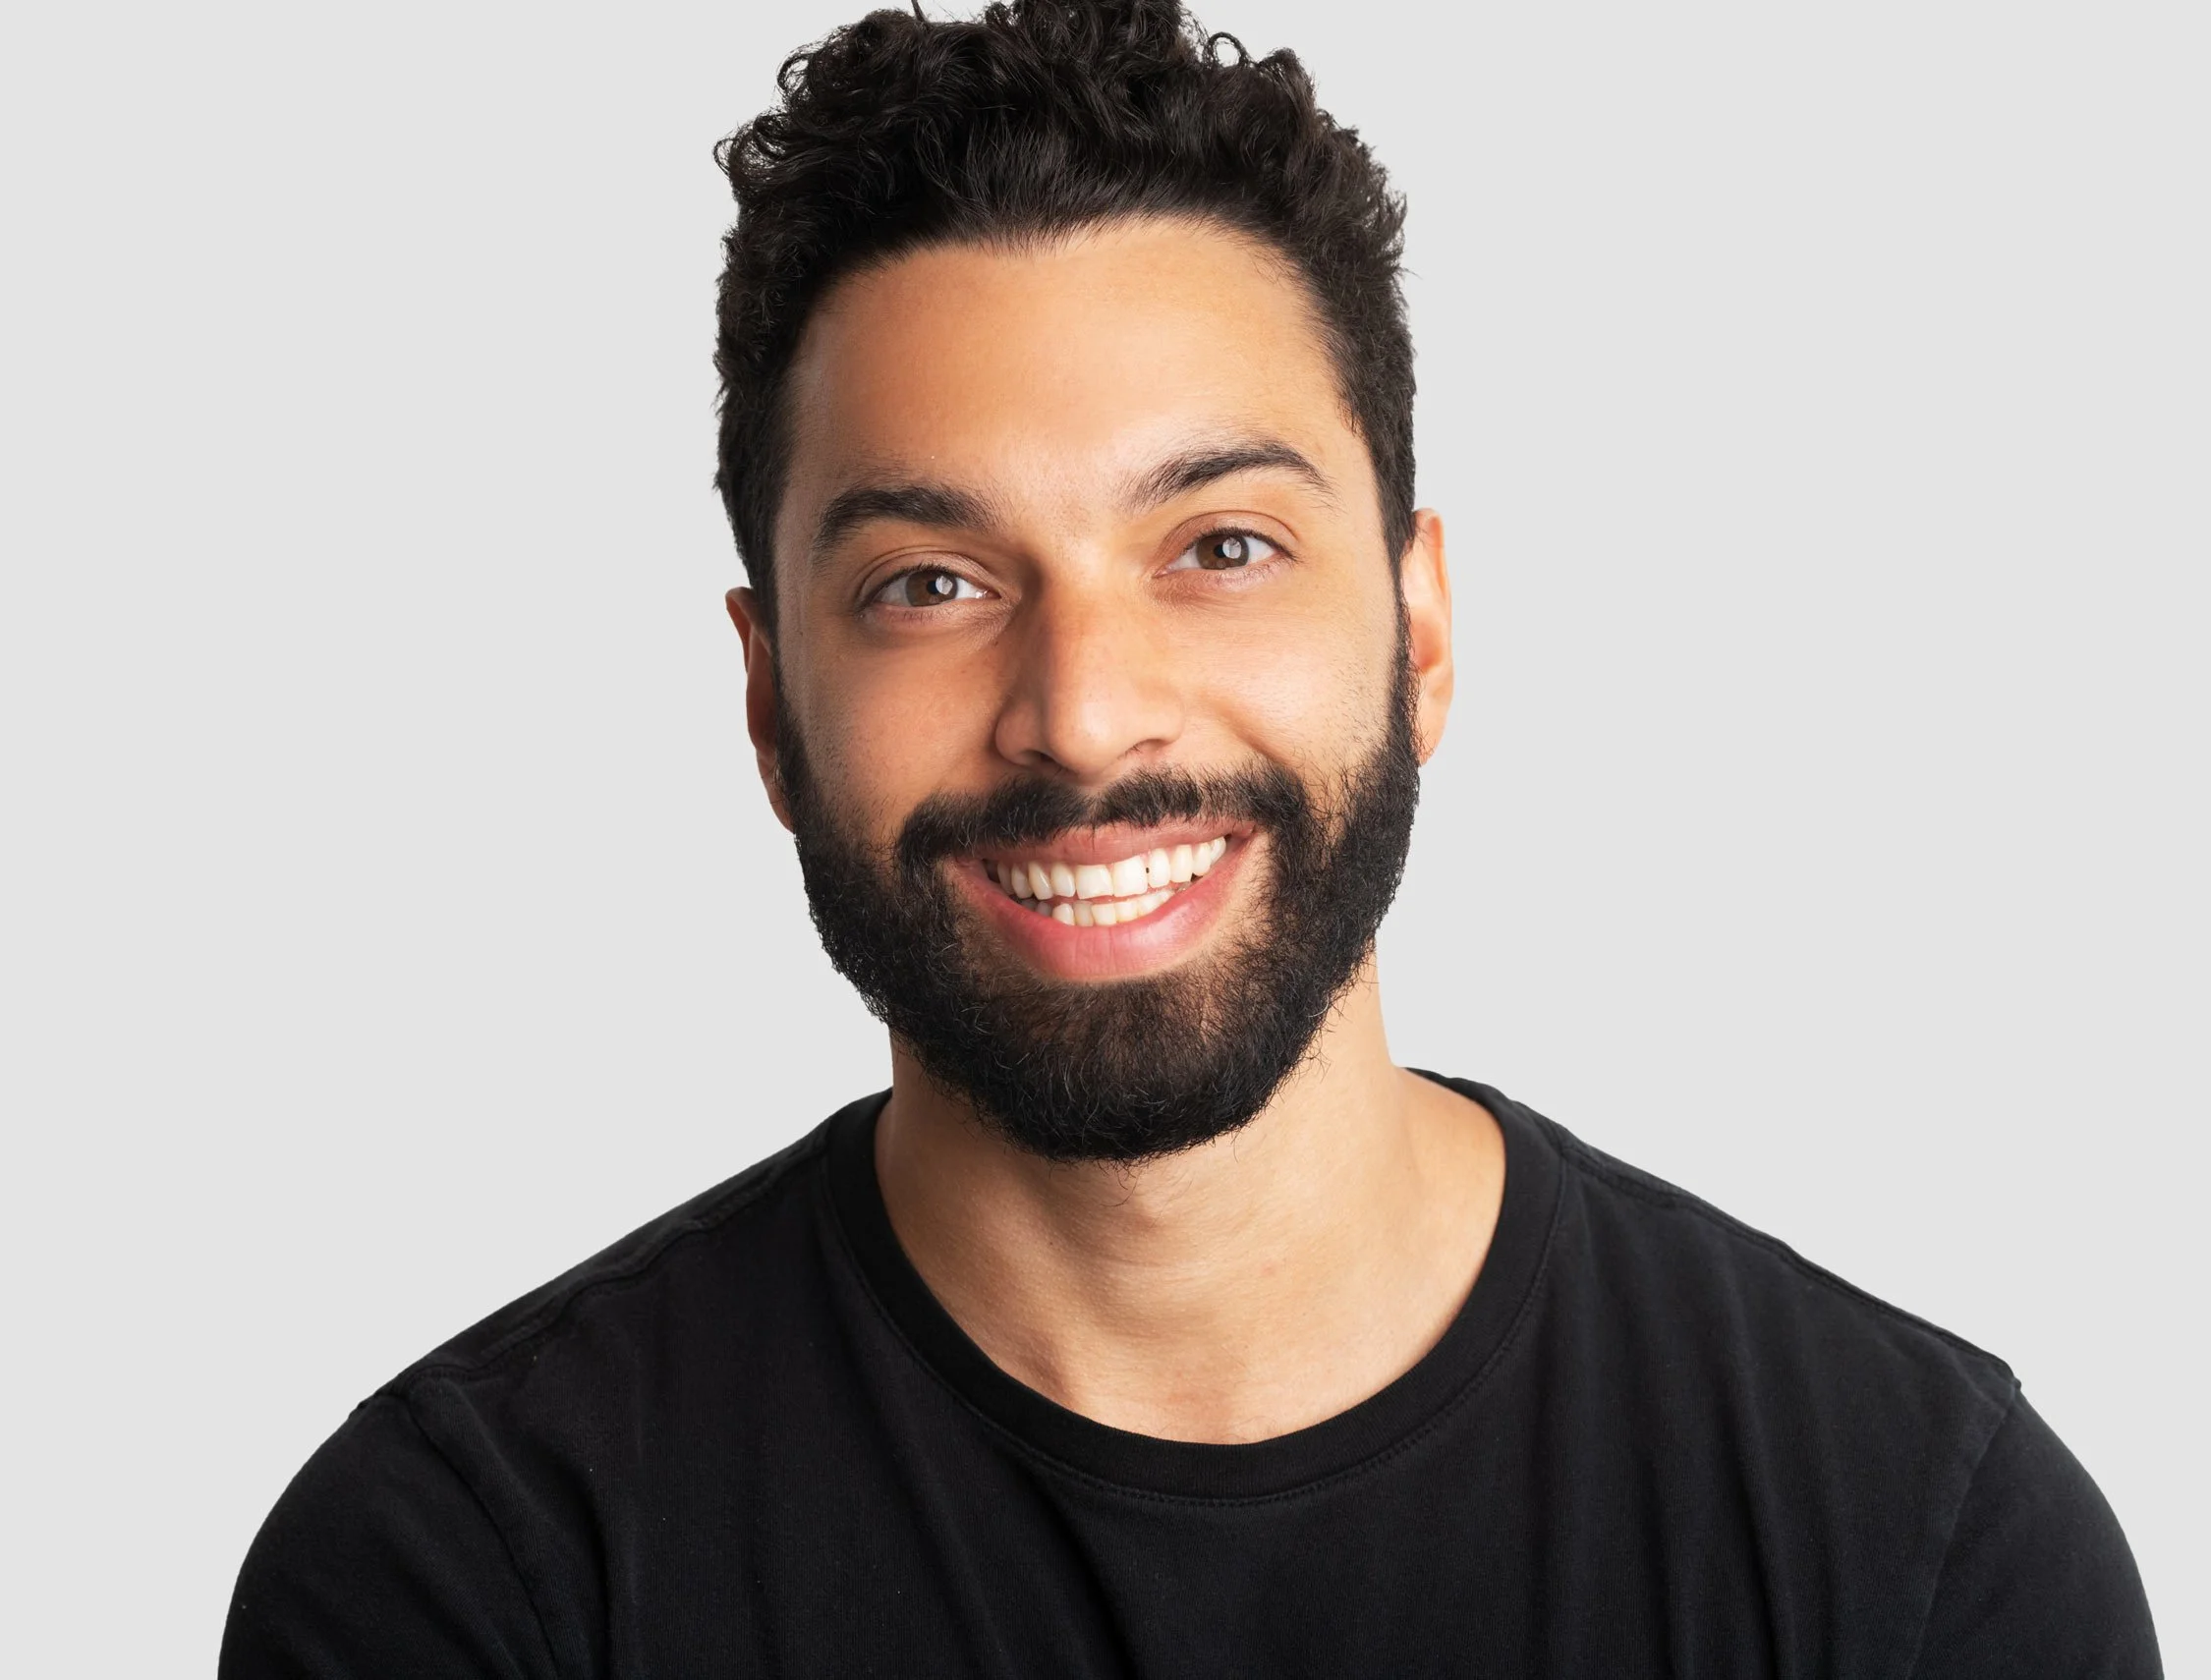
Corporate Headshot
Use and Know More Than One Lighting Technique
When I started my business, headshots nyc, I came to realize that the New York City headshot market is…aggressive, to say the least. Sessions for top photographers start at $1,000 and climb northwards of $2500 for the most well-known names. With this said, one thing I’ve noticed about headshot photographers is that there are some that will use different lighting techniques throughout the course of their career, and there are others that will use the same lighting techniques over and over and over (ad nauseum).
There are advantages to doing both of these things and I’ll explain why. The advantages to using the same lighting technique over and over is that when someone hires you for a headshot session, they’re getting exactly what they’re paying for. Nothing is left to chance or experimentation and what they see in the photographer’s portfolio is a near mirror-duplicate of what they are going to get.
This being said, there are disadvantages to using the same lighting and style over and over - the first being that, after awhile, it gets kinda boring.
Once, en route to a Fuji launch party for the original GFX-100, I passed an extremely well known and successful actor headshot photographers in New York City. His work is nothing short of stunning and beautiful the first time you see it - but his work is also the same shot over, and over, and over and, to be honest, pretty formulaic.
I asked him how he was doing and what he was up to and he looked at me, despondently, morosely, and with the face of someone severely burnt-out (I know the face of burn-out because I pretty much have that face half the time) and replied that he was doing ‘the same old shit.’
We’re talking about a guy that probably makes seven figures a year off his headshot photography and he looked about as excited at life as a kid that’s about to get grounded for three months.
What is the moral of this story? Doing the same shit day in and day out gets boring and eventually becomes soul-sucking. As well, in a field with so much creative latitude, that makes it all the worse.
Try mixing things up a bit. As well, certain lighting techniques work better for certain people, and not everyone requires the same one. I’ve found that people with really angular features and larger noses have much less of a light-wrap around their face in a headshot, for instance. Do not, however, experiment with a paid client in a way that you never have before. There’s a time and a place to get creative and break new ground, but if someone is paying you money that time and place is not at that moment.
And so, 45/45? Loop? Broad? Butterfly? Clamshell. Get acquainted with those terms and know them all.
Styling matters
This is an oft-overlooked facet of headshot photography, but styling matters. And I don’t just mean what the client is wearing (though styling in that regard is usually the biggest point). What I’m actually referring to is everything within the image - including the backdrop. My reason for saying this is that in 2021 I made a run at fashion photography. It’s a brutal industry to try to get into and requires a lot of resilience, fortitude, and perseverance.
One of the things that kept me back for so long as that going into fashion photography I knew nothing about fashion and assumed it was all just a bunch of attractive people and good lighting. I never actually considered the fact that it might have to do with, ya know, fashion.
And so when I did finally realize the clothing and styling element of fashion photography, my work improved by 1000% and my career began to take off.
Similar points can be made in comparison to headshots. Granted, the styling requirements aren’t anywhere near as high, but a well dressed individual in front of a clean and smooth backdrop and with well-styled hair and makeup will absolutely elevate your image and oftentimes by leaps and bounds. If you find yourself with a small case of writer’s block and aren’t sure on styling, check out my article on what to wear for headshots.
Communication

#/media/File:Six_female_war_correspondents_who_covered_the_U.S._Army_in_the_European_Theater_during_World_War_II_in_1943.jpg)
You know what’s sort of super weird? Sitting in a room with a stranger for an hour in silence.
Seriously.
I often think one of the best things about my job is being able to sit in a room alone, with a stranger, and basically just hang out with them for an hour or two. The two of them become bffs, you shoot them, and then they leave.
What’s better than that?
Communication is critical for two reasons - the first being that the more comfortable a person feels around you, the more authentic and natural they’re going to be in front of the camera. Sitting there in absolute silence for hours on end is super offsetting, and eventually doing this will ensure that your client’s facial expression after awhile begins to look a bit not so relaxed.
The second reason communication is critical is because the photographer can simply direct and give feedback. The client is not going to have any real idea on how they look in front of the camera (unless you’re tethered and you show them the entire time), and so giving them direction throughout the session is a necessity.
Know The Market
This is a bit of a nebulous topic but relevant. Every market at any given time has a certain look to it - this can be said of the graphic design found in advertisements, the shape of new cars coming out of a factory and onto a lot, and the clothing and hairstyles found within a fashion magazine.
And this can absolutely be said about the market, and especially for corporate headshots.
Headshots and portraits taken ten years ago are going to look quite a bit different from the headshots and portraits that are taken today. Lighting, styling, and even editing are going to play a huge role in the end product of a contemporary headshot and they make look drastically different than the lighting, styling, and editing of headshots produced ten years ago.
One headshot photographer in particular has a style that very largely mimics that of instagram filters. He has a bit of a faded film effect going on in his work and that type of creative liberty was a complete non-presence in the headshots of yesteryear. Black and white headshots as well were, for instance, extremely common in the early 2000s and late 90s - now showing up to a casting with a black and white headshot will probably result in several looks of abject confusion.
This being said, a both headshot photographer should take a look at his or her own work and ask themself if it fits into whatever is that current time period’s overarching aesthetic. Is it fitting? Does it work? There are trends in headshots just like there are trends in anything else. And, also importantly, are they priced in accordance with the current market? To figure out where rates currently sit, check out my actor headshot packages and that’ll give you a pretty good idea on current market rates.
Conclusion
Taking the above principles into account whether you be the client or whether you be the photographer and you’ll have a much easier time of things and a much better experience on the whole with your headshot photography. For even more tips, check out five things to know about headshots in 2024.
For any questions or concerns, or simply to inquire about my own work, please email hello@joejenkinsphoto.com